
How can we help you today?
Enterprise AzureAD Application for SSO, Conditional Access, Storage and Office Online Editing
All-in-one MyWorkDrive Azure Application
This guide is for environments that would like to consolidate any and all MyWorkDrive’s Azure functions (Single sign-on, OneDrive/SharePoint storage, Application Proxy, and Office Online Edit) into a single Azure application.
It is not necessary to use these instructions to use these features with MyWorkDrive.
This is an advanced configuration. Confirmation of SAML SSO with AzureAD (Entra) is outlined in this article.
MyWorkDrive hosts shared apps for most services and they can easily be enabled on a case by case basis. These instructions provide a way to provision your own single Enterprise App to enable all features in MyWorkDrive.
These can also individually be configured as separate apps.
Please reach out to us for assistance if you have any questions about using these instructions.
This guide will step through the complete process
- Add an Enterprise App in Azure
- Configure Application Proxy in Azure for the new Enterprise App and MyWorkDrive Server(s)
- Configure the new APP for SSO in Azure
Frequently administrators will add features to SSO such as Conditional Access / Compliant device requirements - Enable SSO in MyWorkDrive
- Configure GraphAPI on the new App in Azure for OneDrive / SharePoint Storage
- Enable OneDrive/SharePoint storage in MyWorkDrive
- Configure GraphAPI on the new App in Azure for Office Online Editing
- Enable Office Online Editing in MyWorkDrive
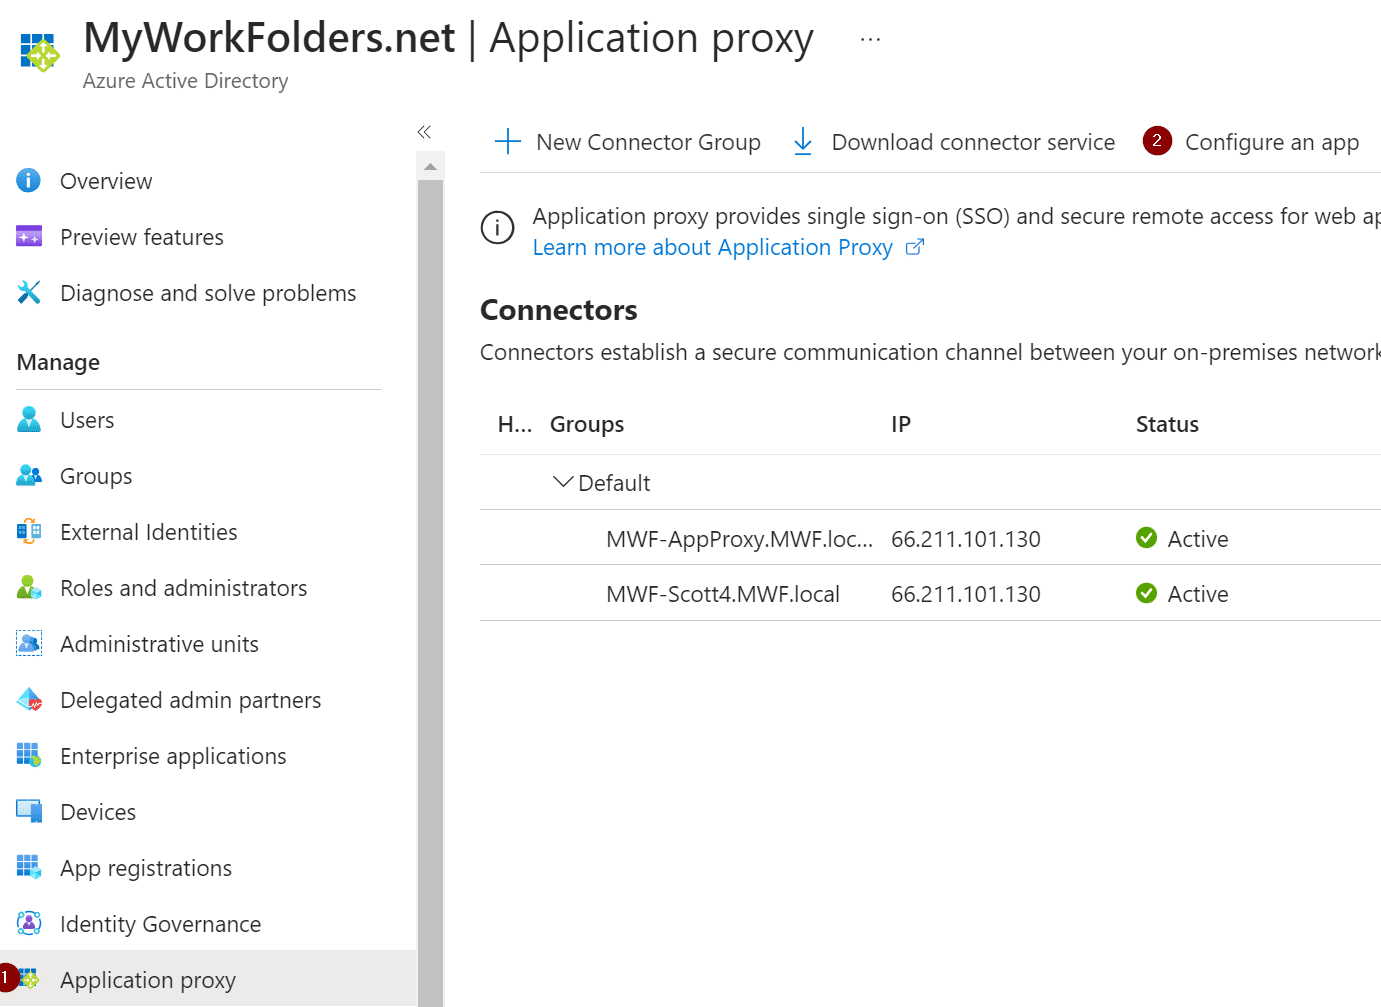
Application Proxy
If you want to leverage conditional access and/or application proxy, we must create our app initially with this process. For further information on MyWorkDrive and conditional access/application proxy, please review our article here.
Browse to Azure AD and select Application proxy and then select Configure an app.
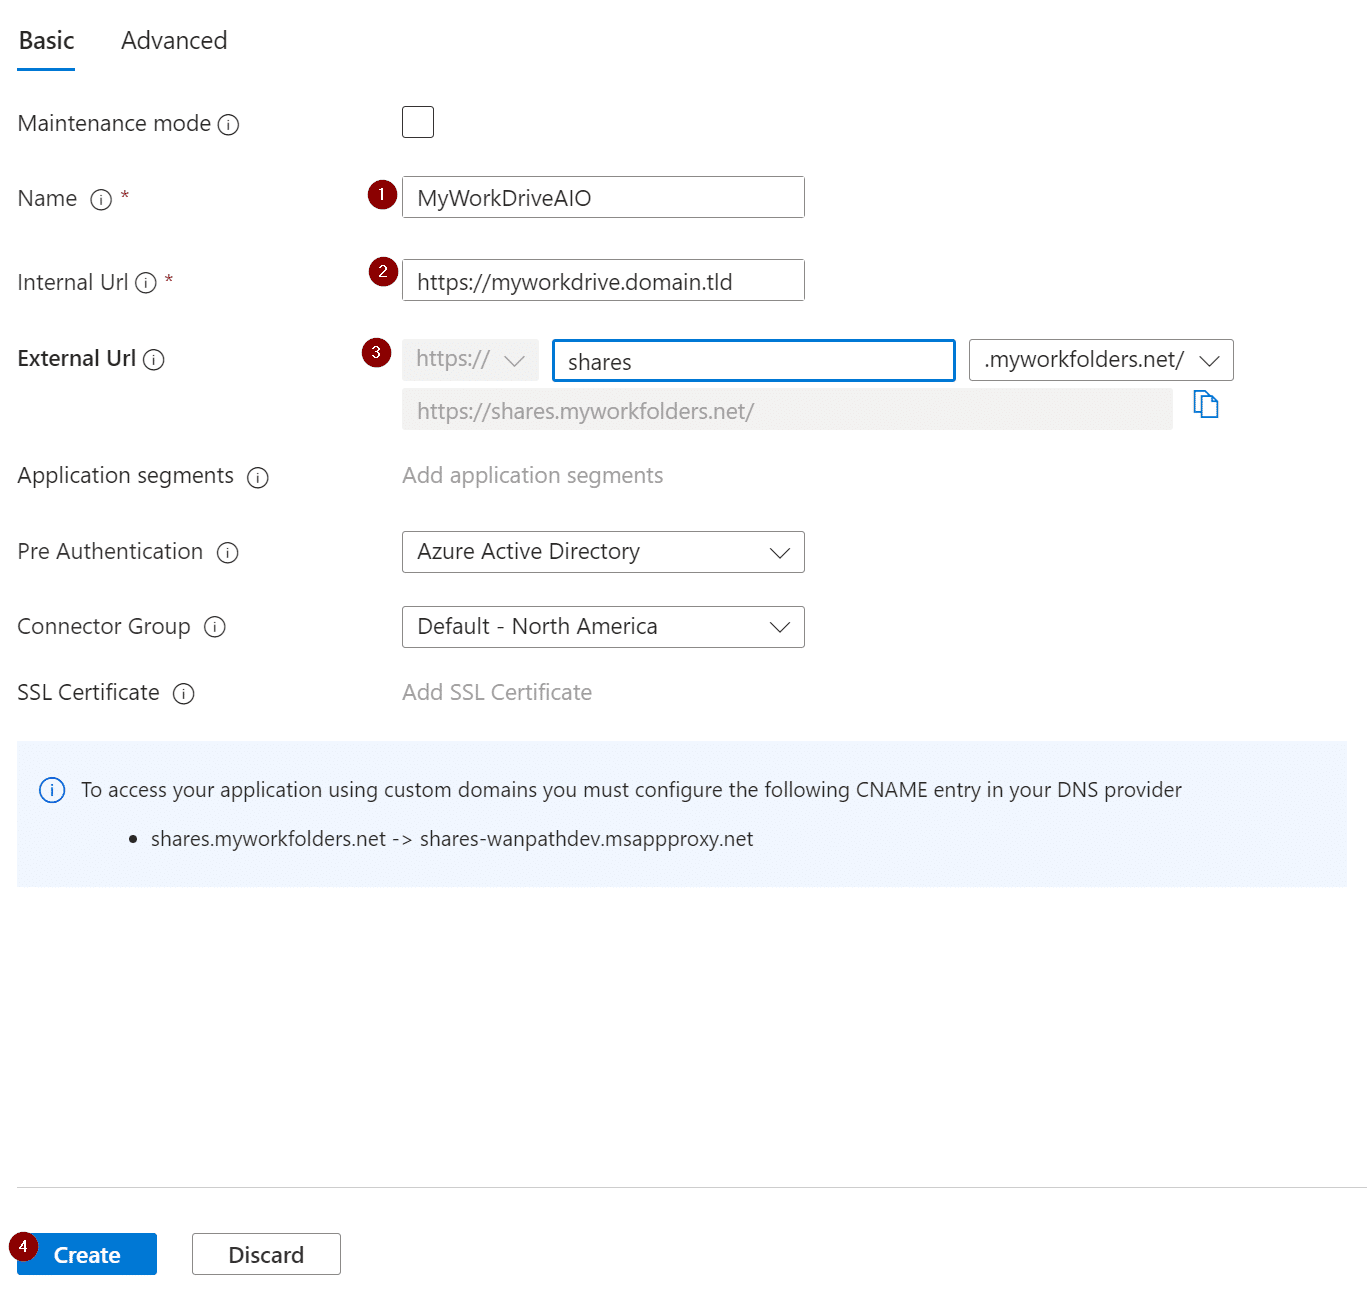
Fill in the details for the name of your app, your MyWorkDrive server, external dns name, and select Create:
Single Sign-On
If you do not need application proxy, you can instead start the process using our existing MyWorkDrive Azure App. Details are available here.
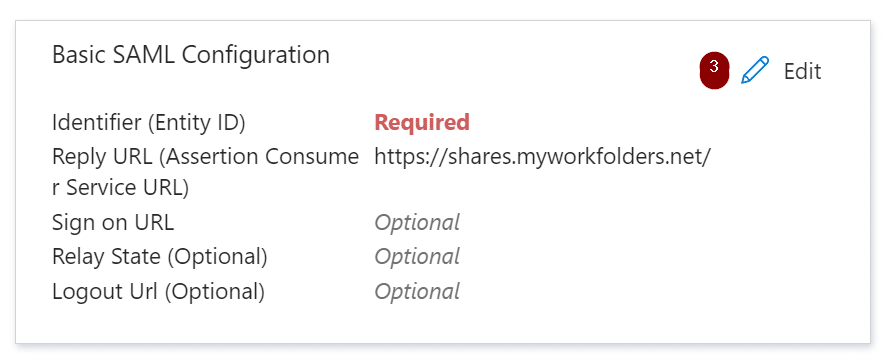
Otherwise, navigate to Azure AD, open Enterprise applications, and browse to the newly created app. Open Single sign-on and select SAML. On the next page, select Edit next to Basic SAML Configuration.

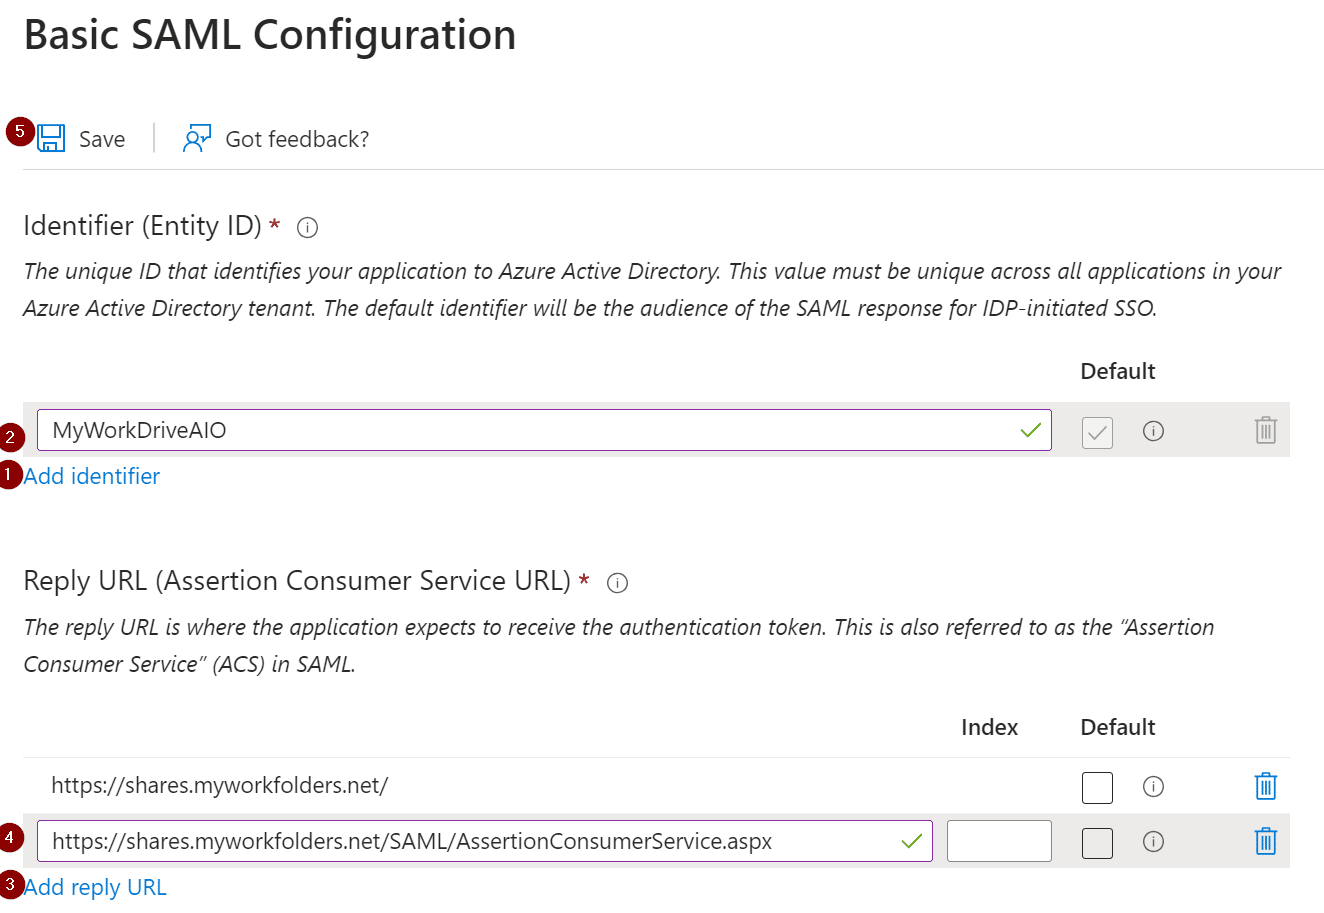
Under the Basic SAML Configuration page, enter a name for the identifier, then add an additional Reply URL. The additional Reply URL will be the same external address as your MyWorkDrive server with the addition of the suffix:
SAML/AssertionConsumerService.aspx
After both are entered, select Save.
Now, log into the MyWorkDrive server, navigate to the Enterprise tab, enable SAML/ADFS SSO, select AzureAD SAML from the dropdown menu, and select Modify connection.
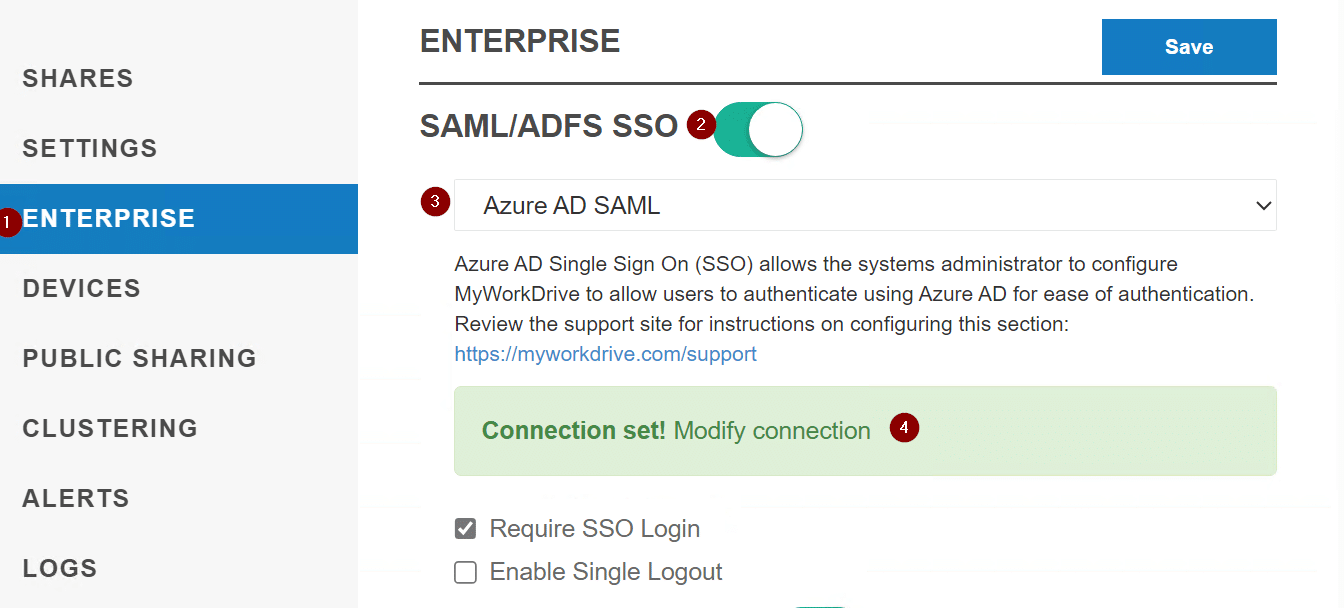
Copy/paste the Azure App Federation Metadata URI and the Service provider name from earlier and select Save.

Lastly, back on the Enterprise page, ensure the Require SSO Login checkbox is selected and click Save at the top.

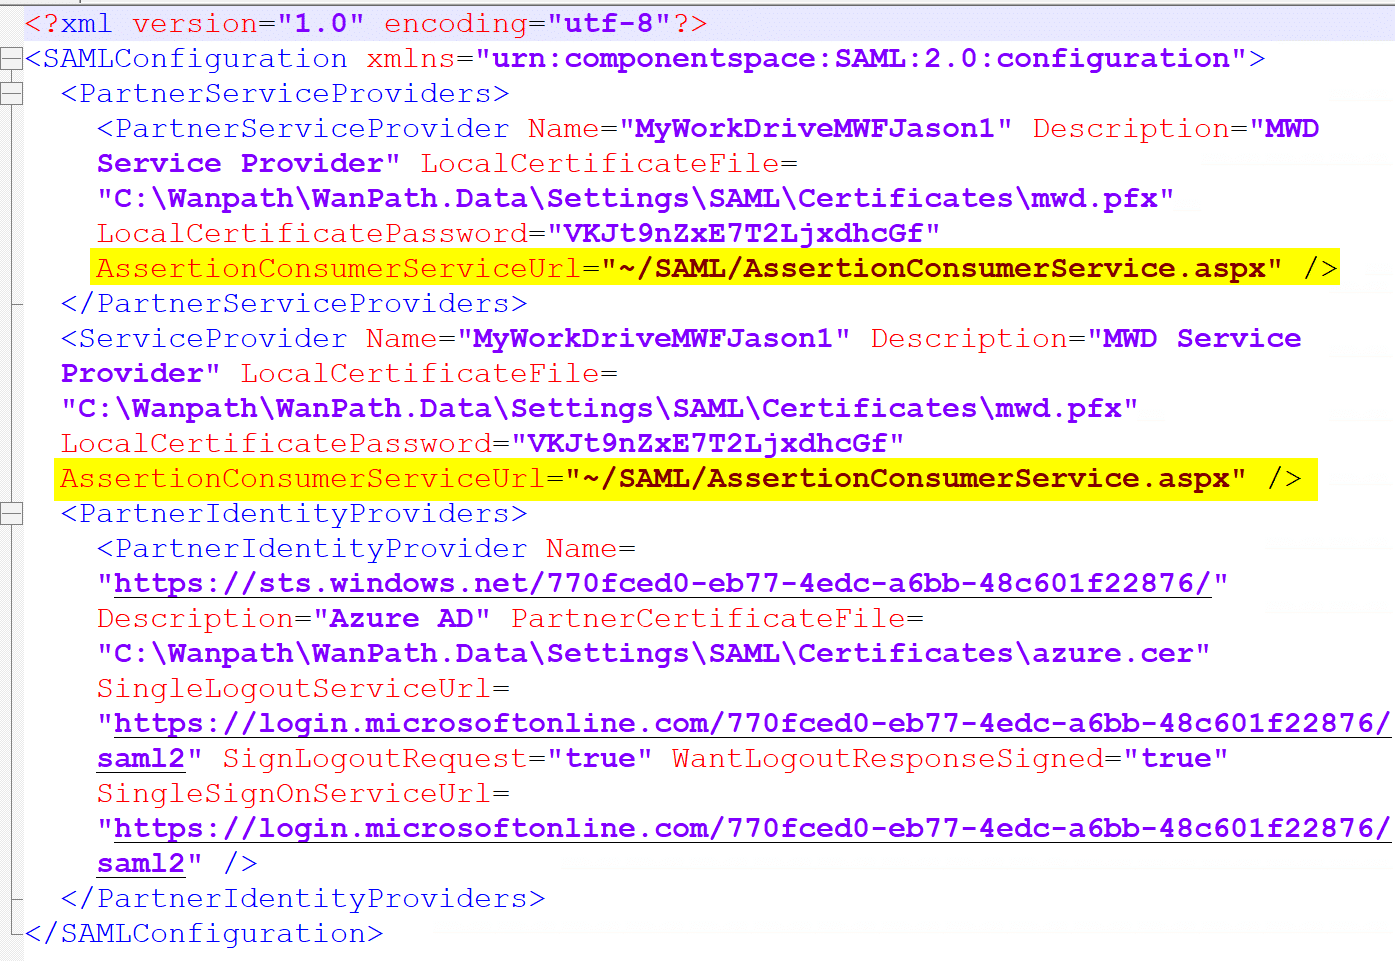
Note: If you are using Application proxy, there is one more additional step. Open windows explorer and navigate to:
C:\Wanpath\WanPath.Data\Settings\SAML
And edit the saml.config file with your preferred text editor. Ensure it is opened with administrative privileges.
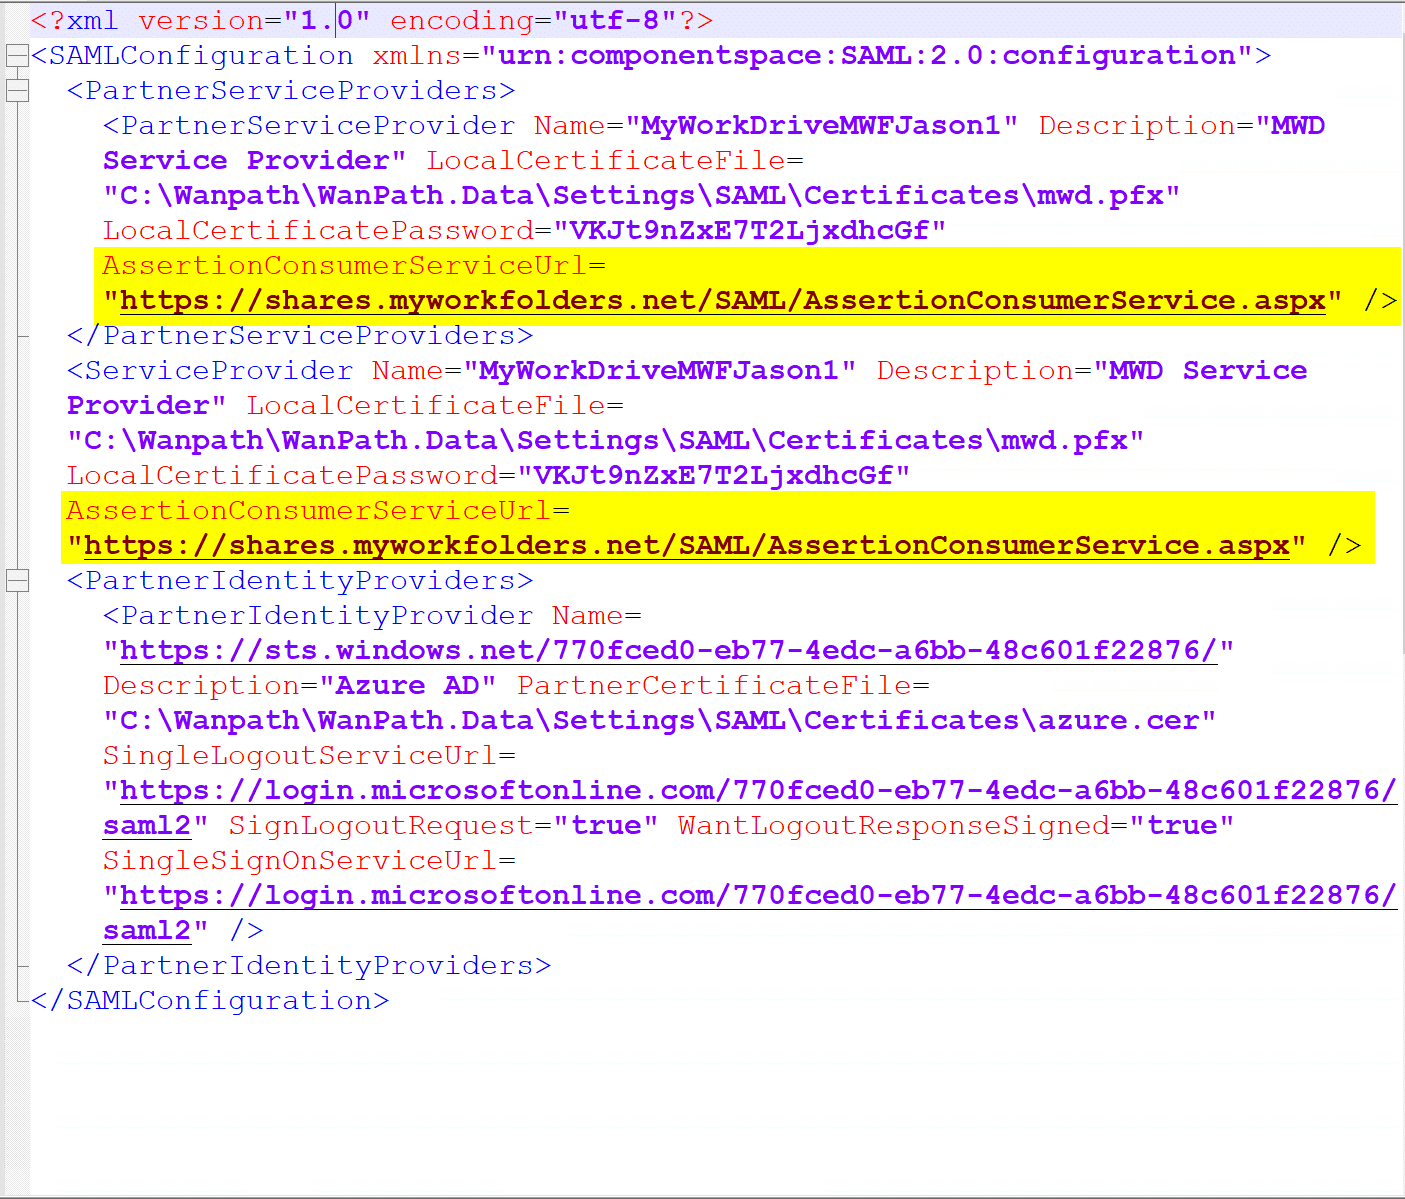
Find both the AssertionConsumerServiceUrl fields and change the “~” in each field to the full server URL and save the file.
Before:
After:
OneDrive/SharePoint Storage
Next, we’ll configure this application to leverage OneDrive/SharePoint for storage.
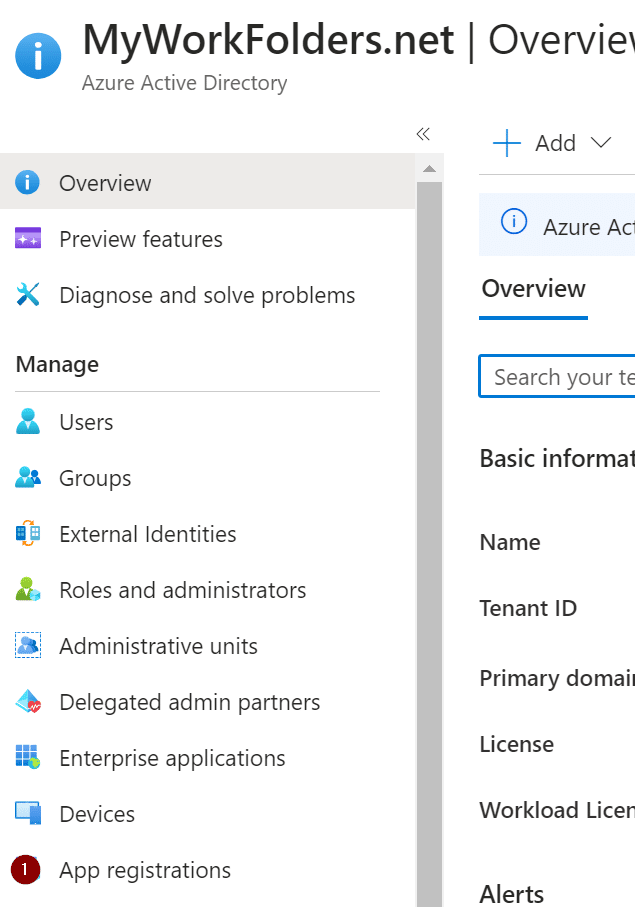
Go back to the AzureAD Overview page and navigate to App registrations.
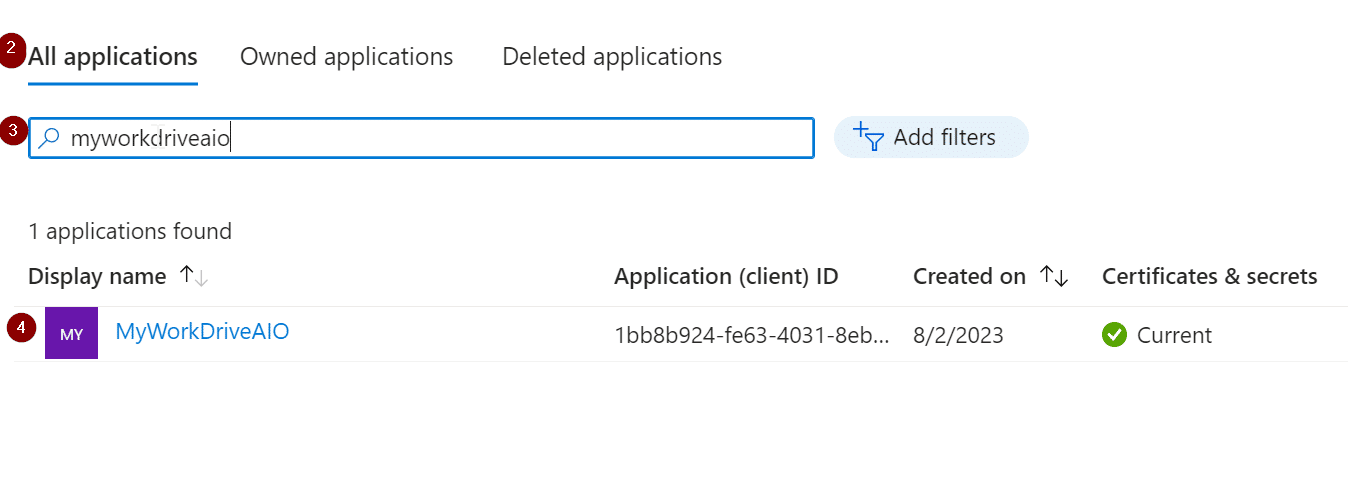
On the next page, select All applications, search for your previously created application and select it in the list beneath the search bar.

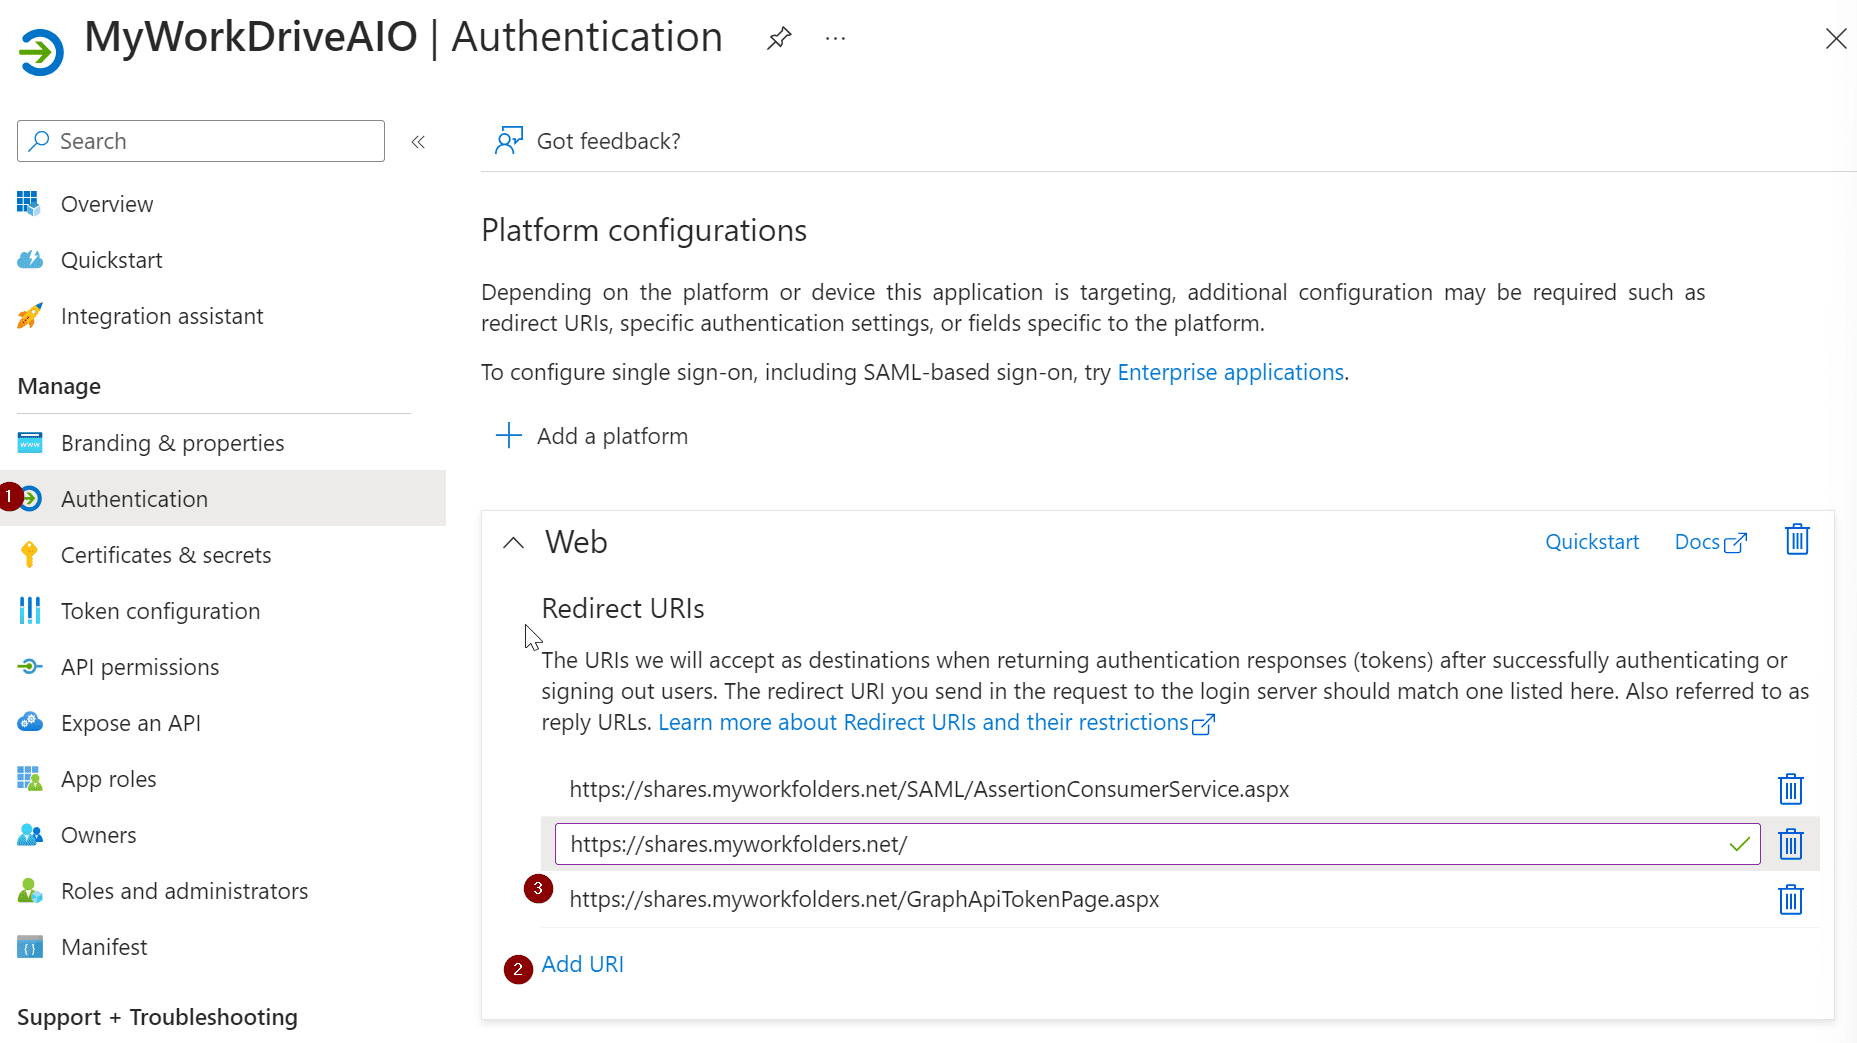
Next, browse to the Authentication window, under Web select Add URI, and then add another entry. The additional Redirect URI will be the same external address as your MyWorkDrive server with the addition of the suffix:
SAML/AssertionConsumerService.aspx
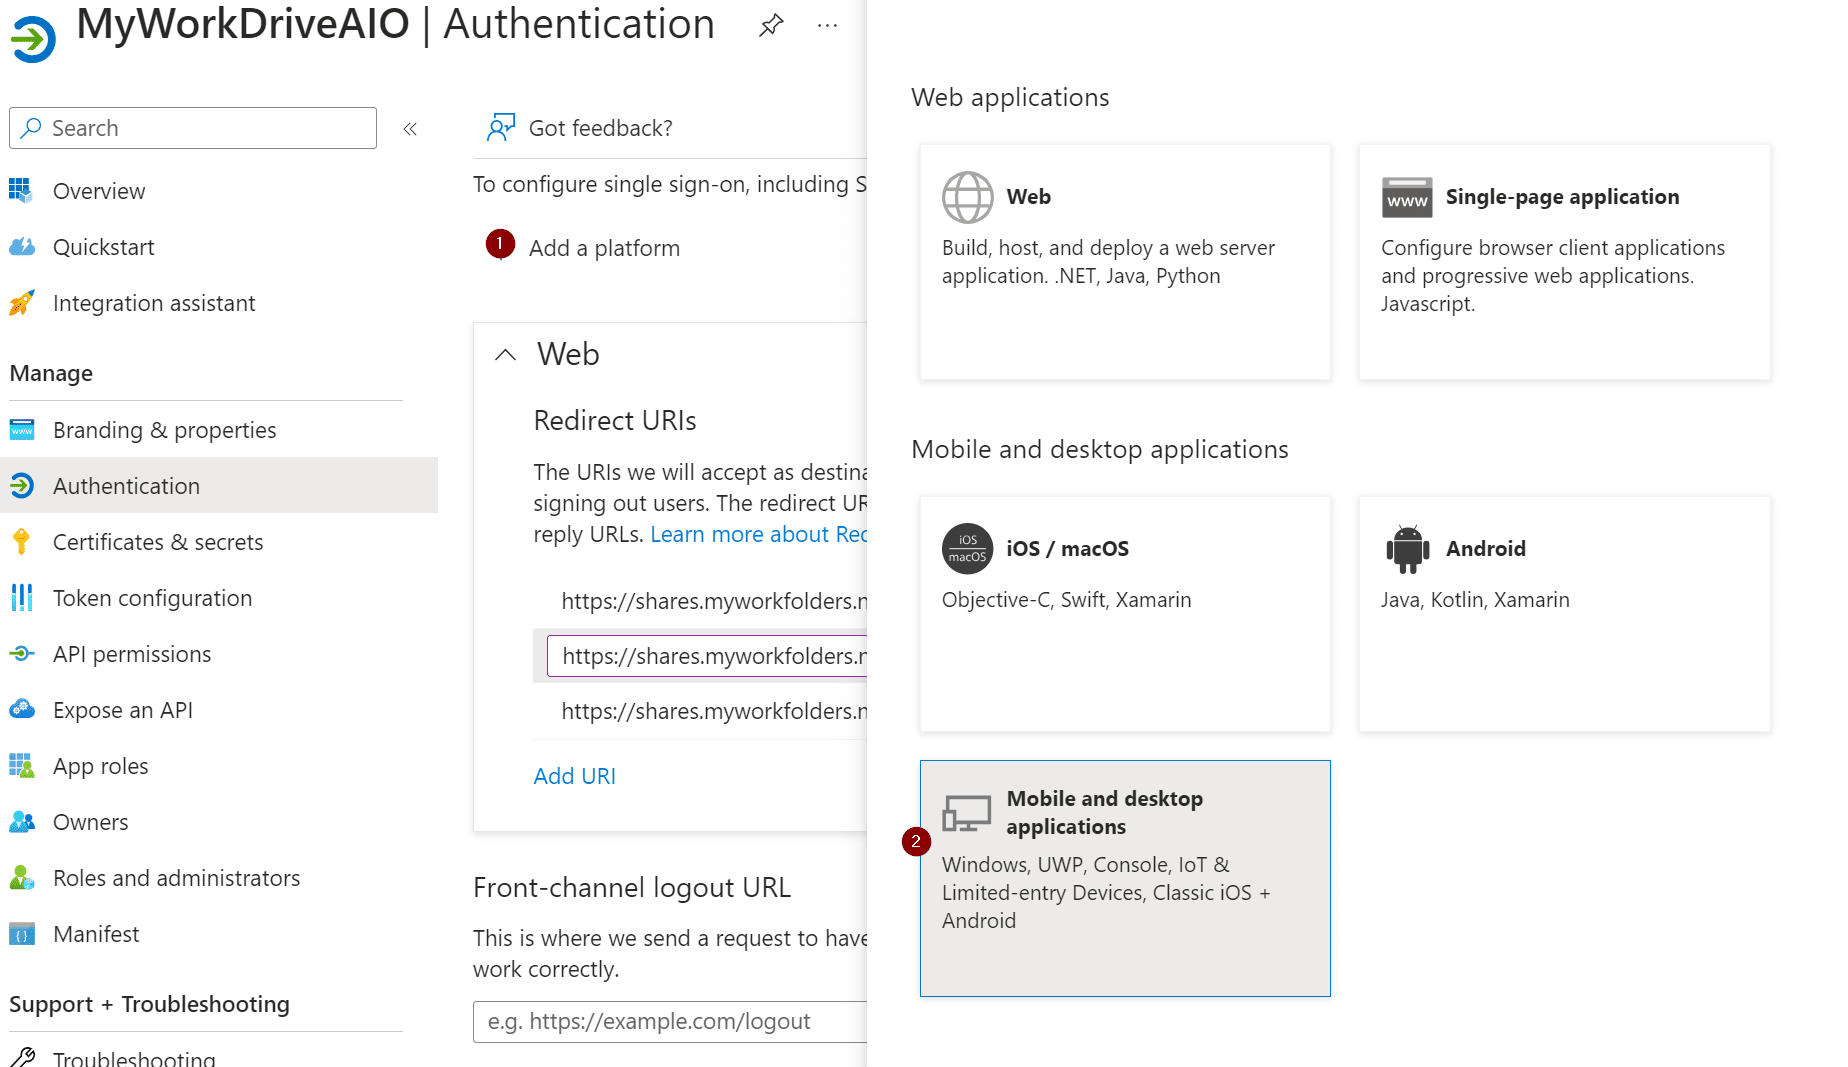
After that, select Add a platform and choose Mobile and desktop application.
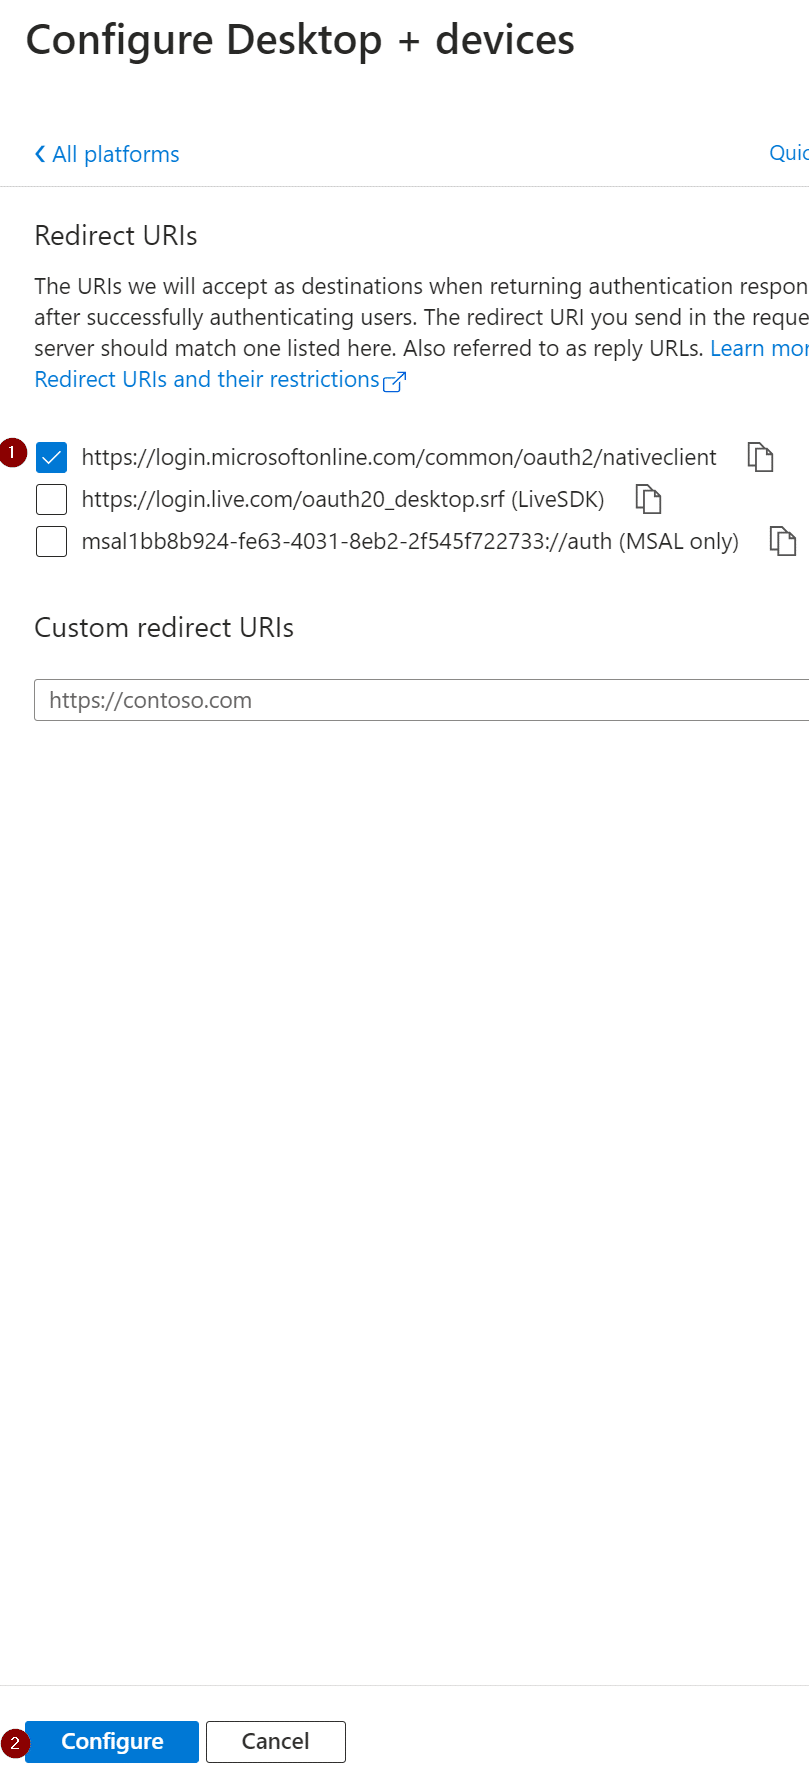
On the next page, select the top checkbox (…/nativeclient) and then click Configure.
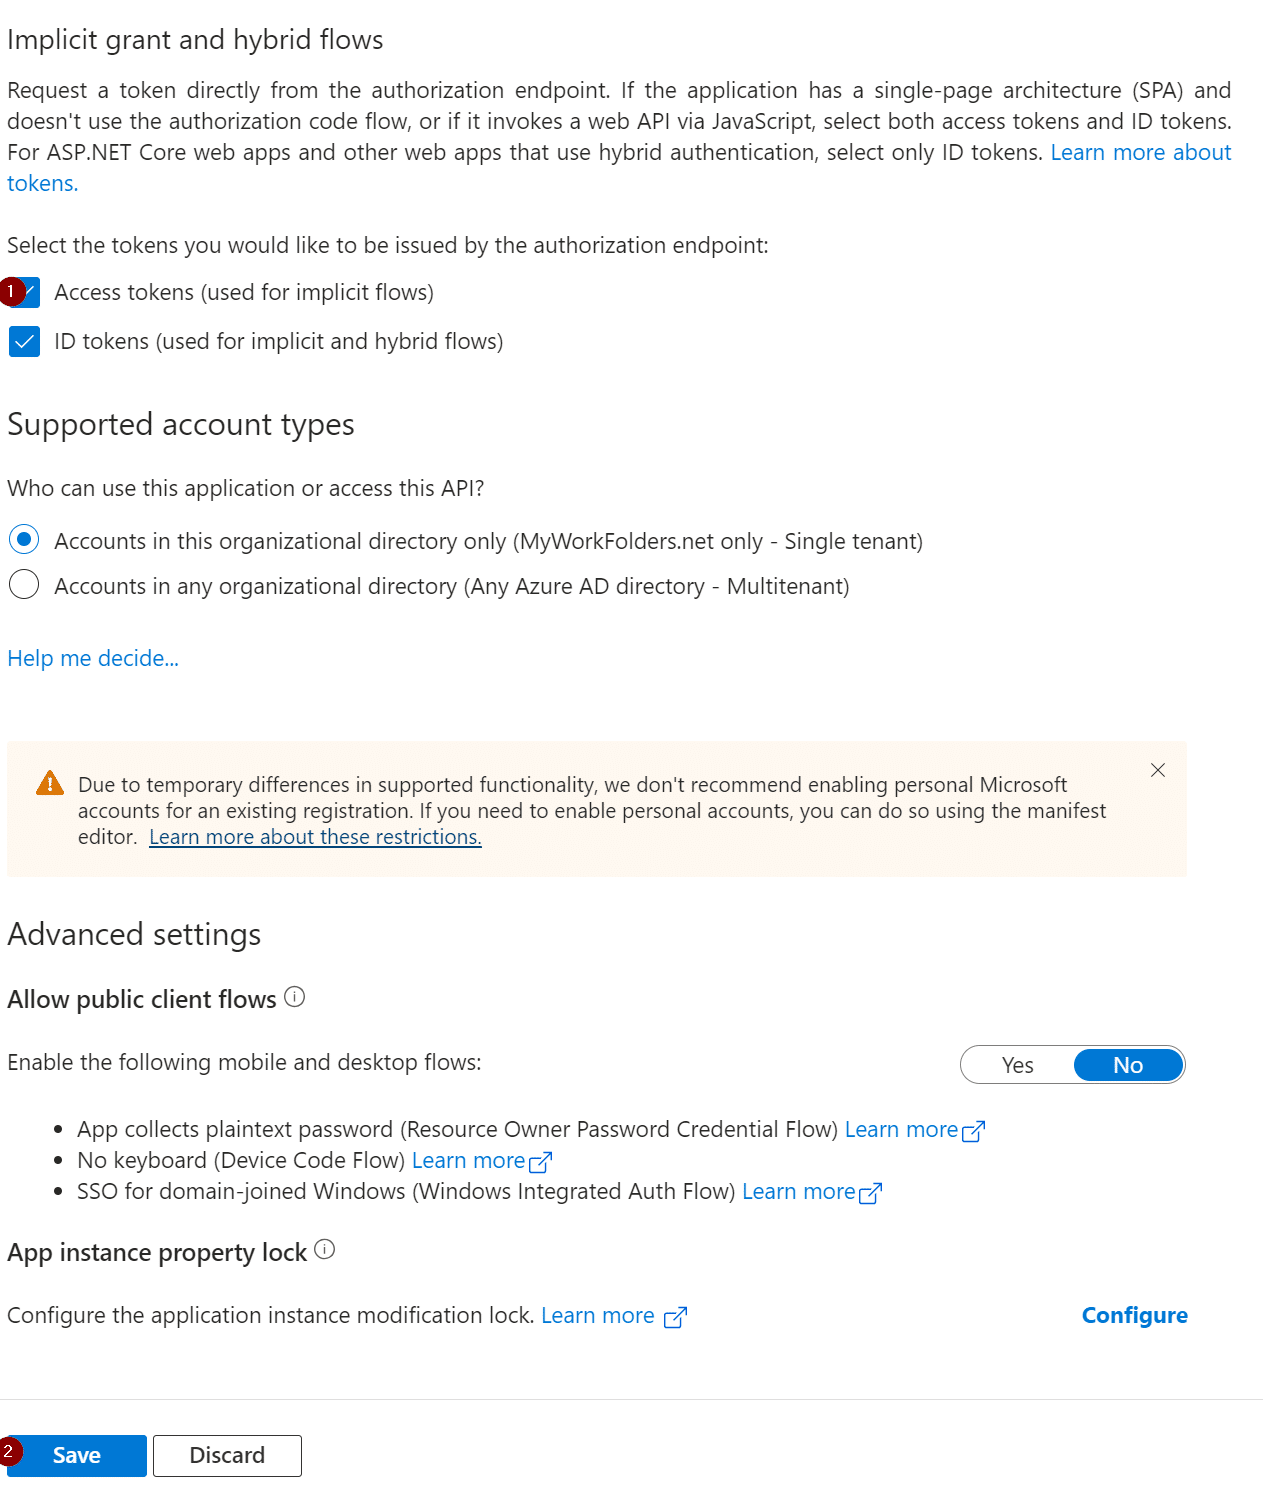
Scroll down the Authentication page and check the Access tokens box and then choose Save at the bottom of the page.
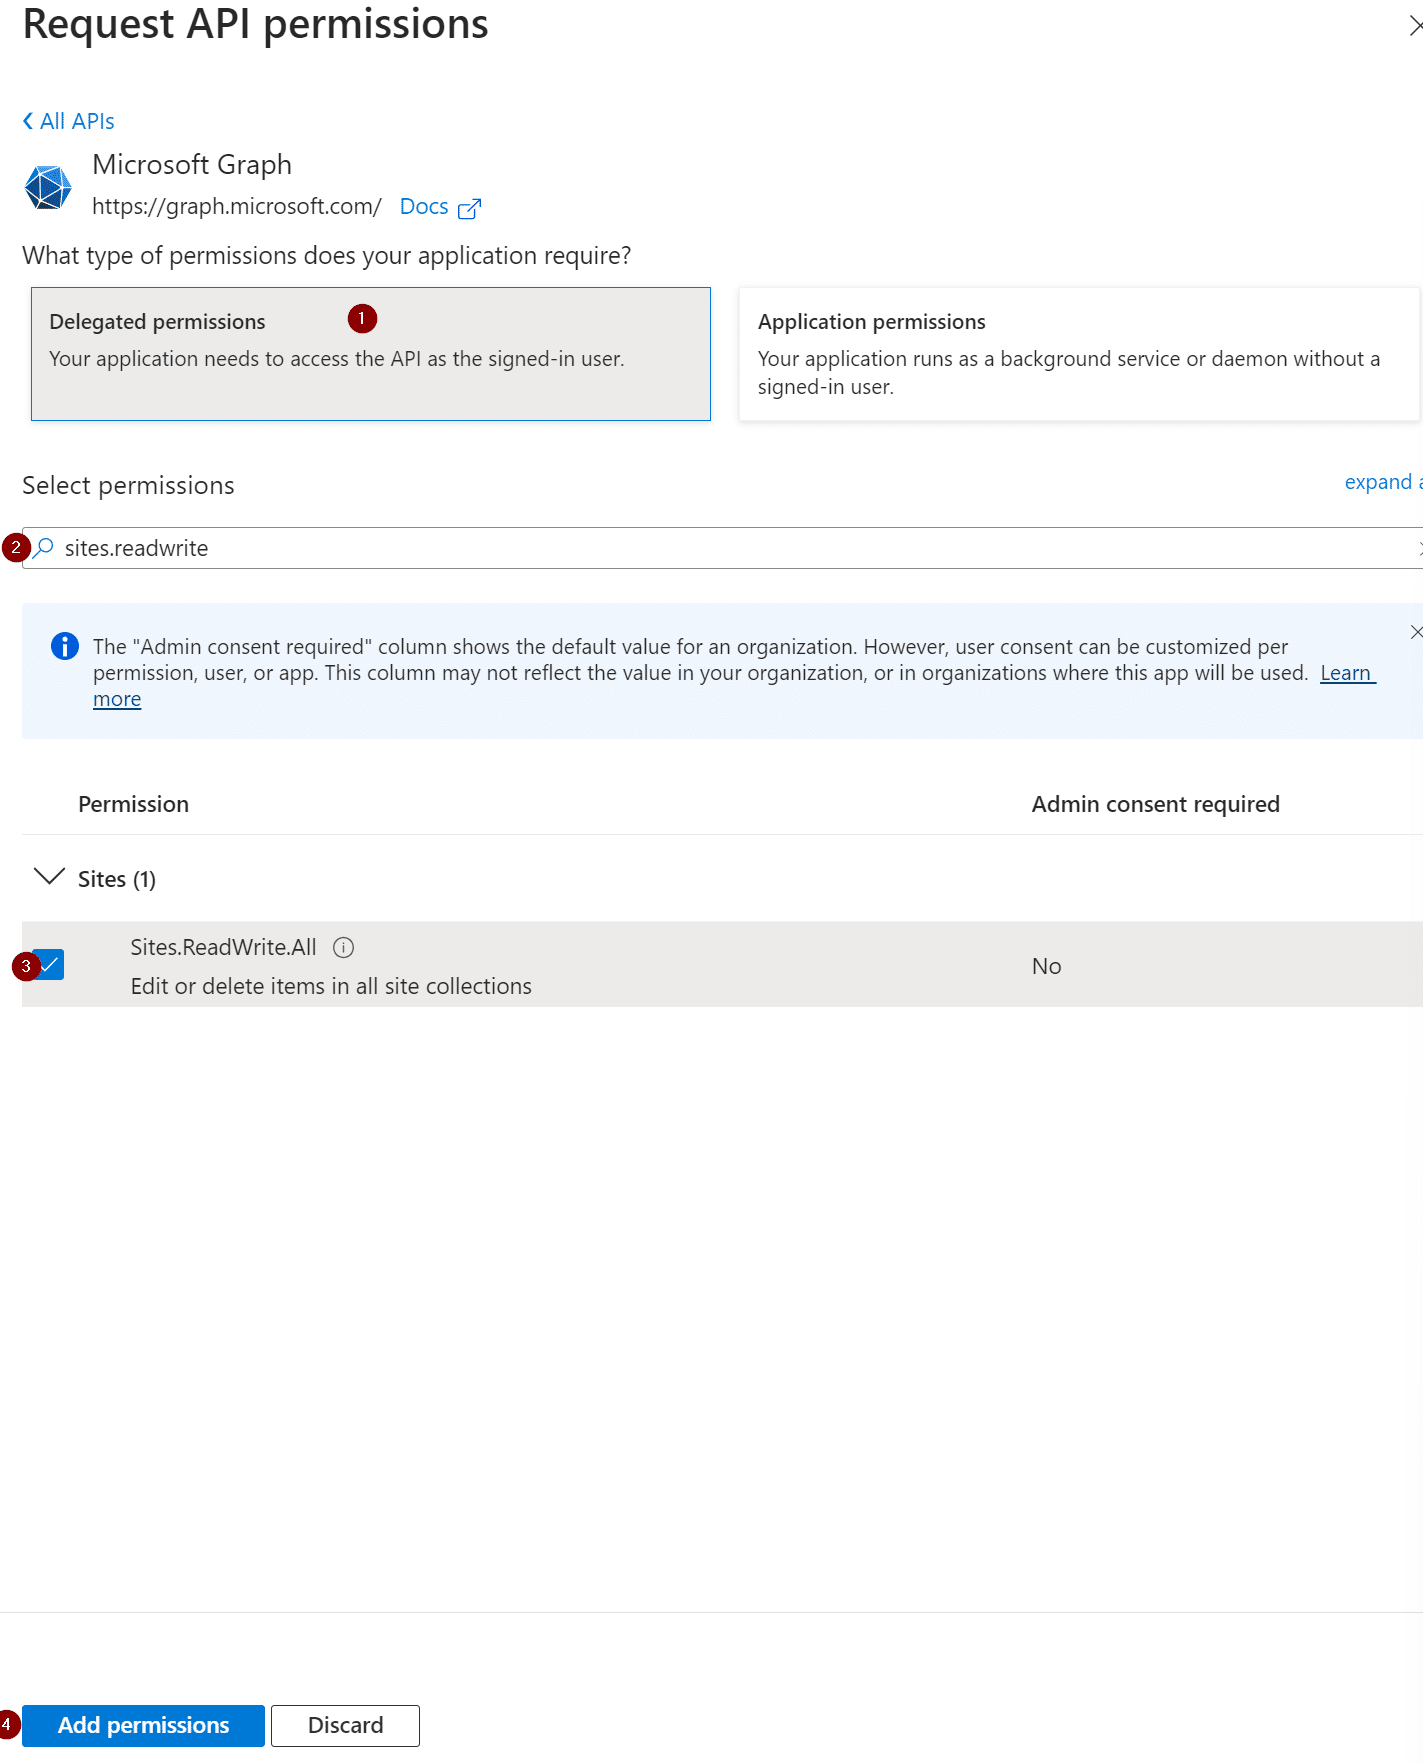
Next, navigate to API permissions and select Add a permission.

Select Microsoft Graph at the top.

Then choose Delegated permissions on the next page and search and add the following permissions then select Add permissions at the bottom:
• Files.ReadWrite.All
• offline_access
• openid
• Sites.ReadWrite.All
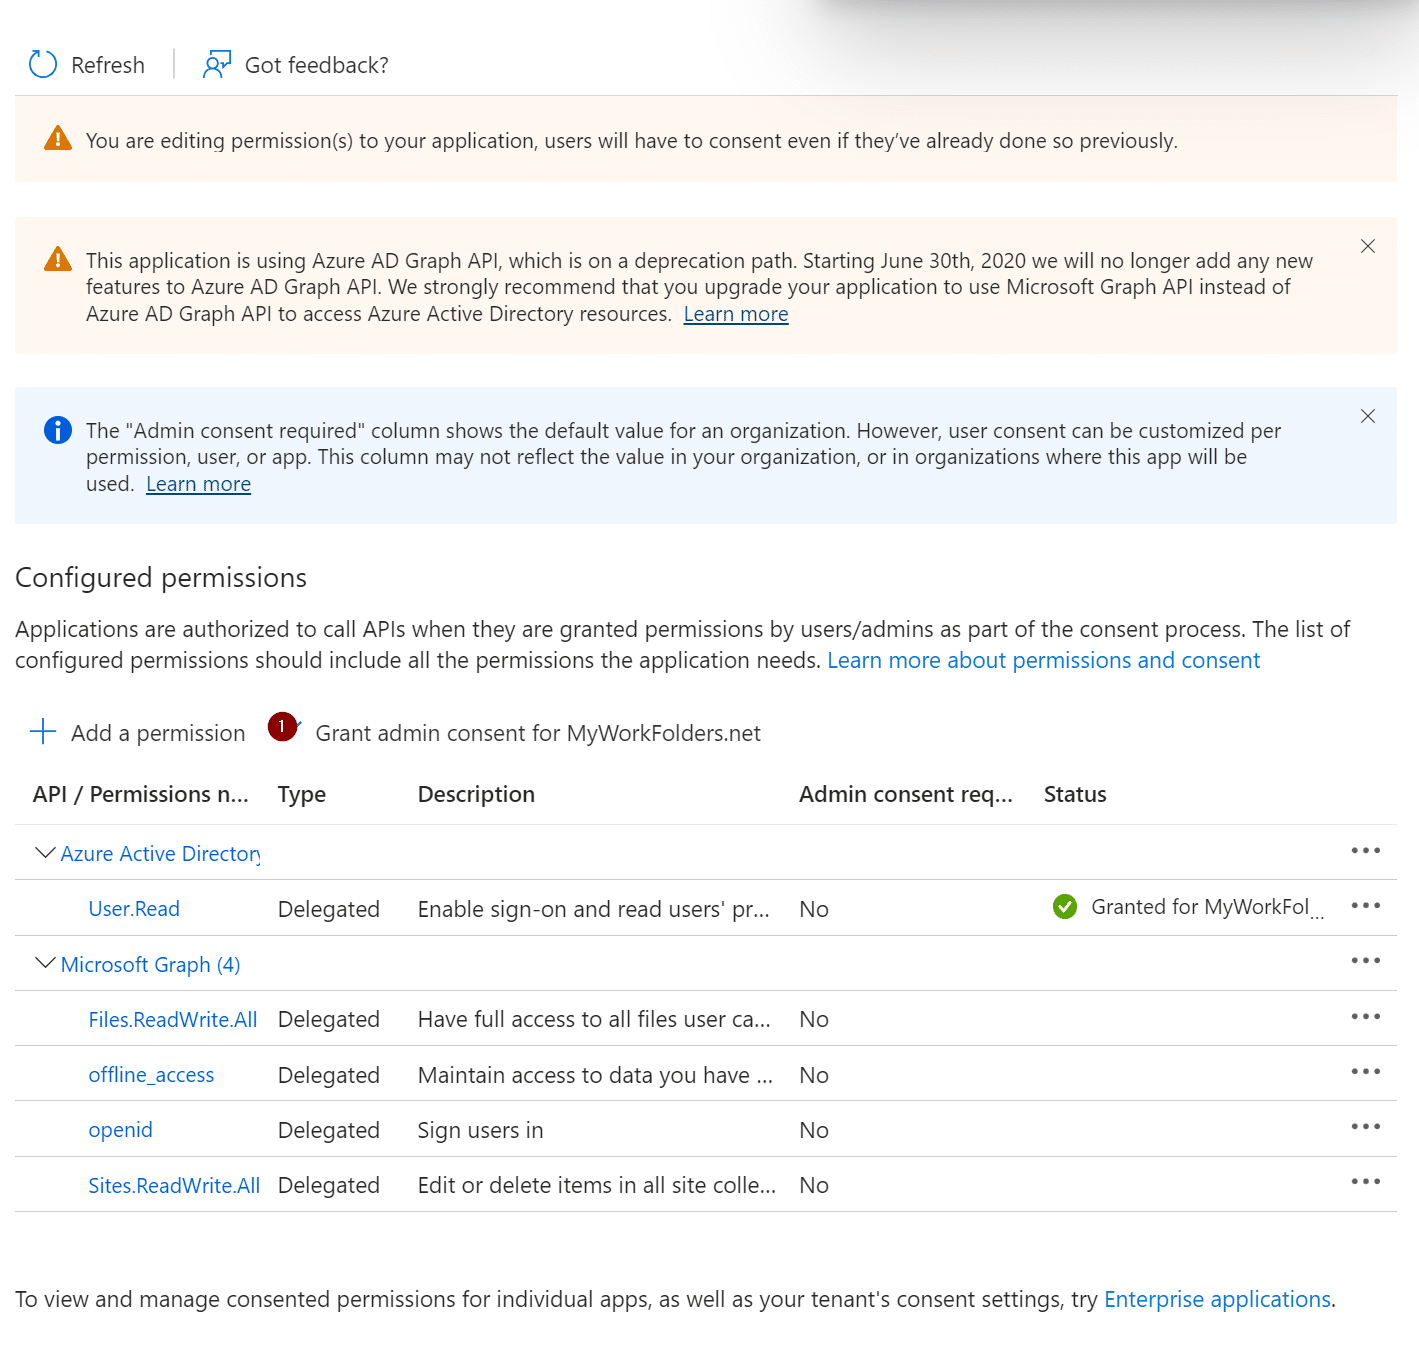
Back on the API permissions page, select Grant admin consent for your domain.

Next, navigate to Certificates & secrets and select New client secret. On the next page, add a Description and when the secrets will Expire. Finally, select Add.
After it generates, take note of the Value listed as we will need it later. The Secret ID is not used in MyWorkDrive and can be ignored.

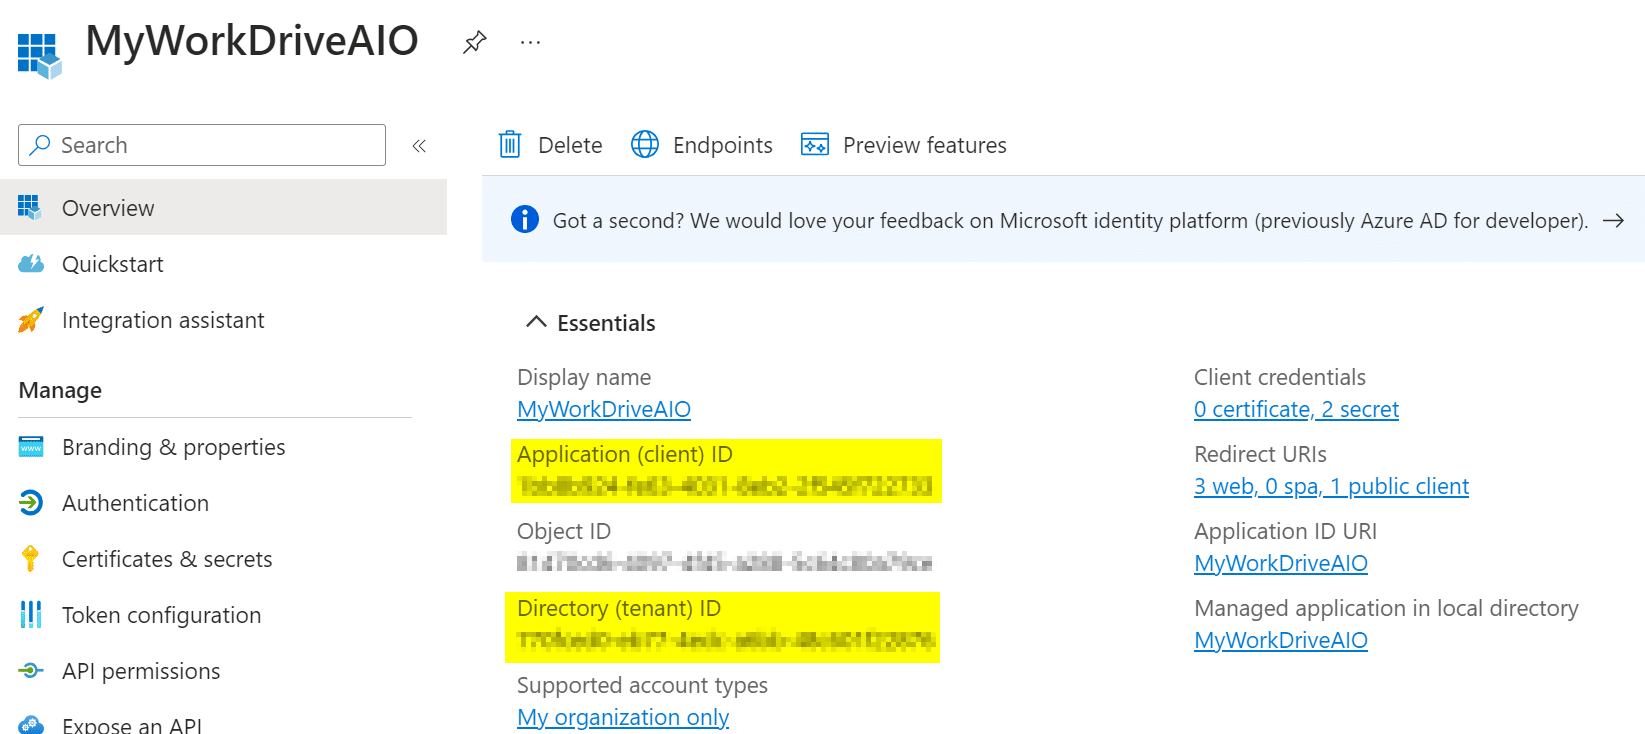
Next go back to the Overview page under App registrations and take note of the application ID and the Directory (tenant) ID.
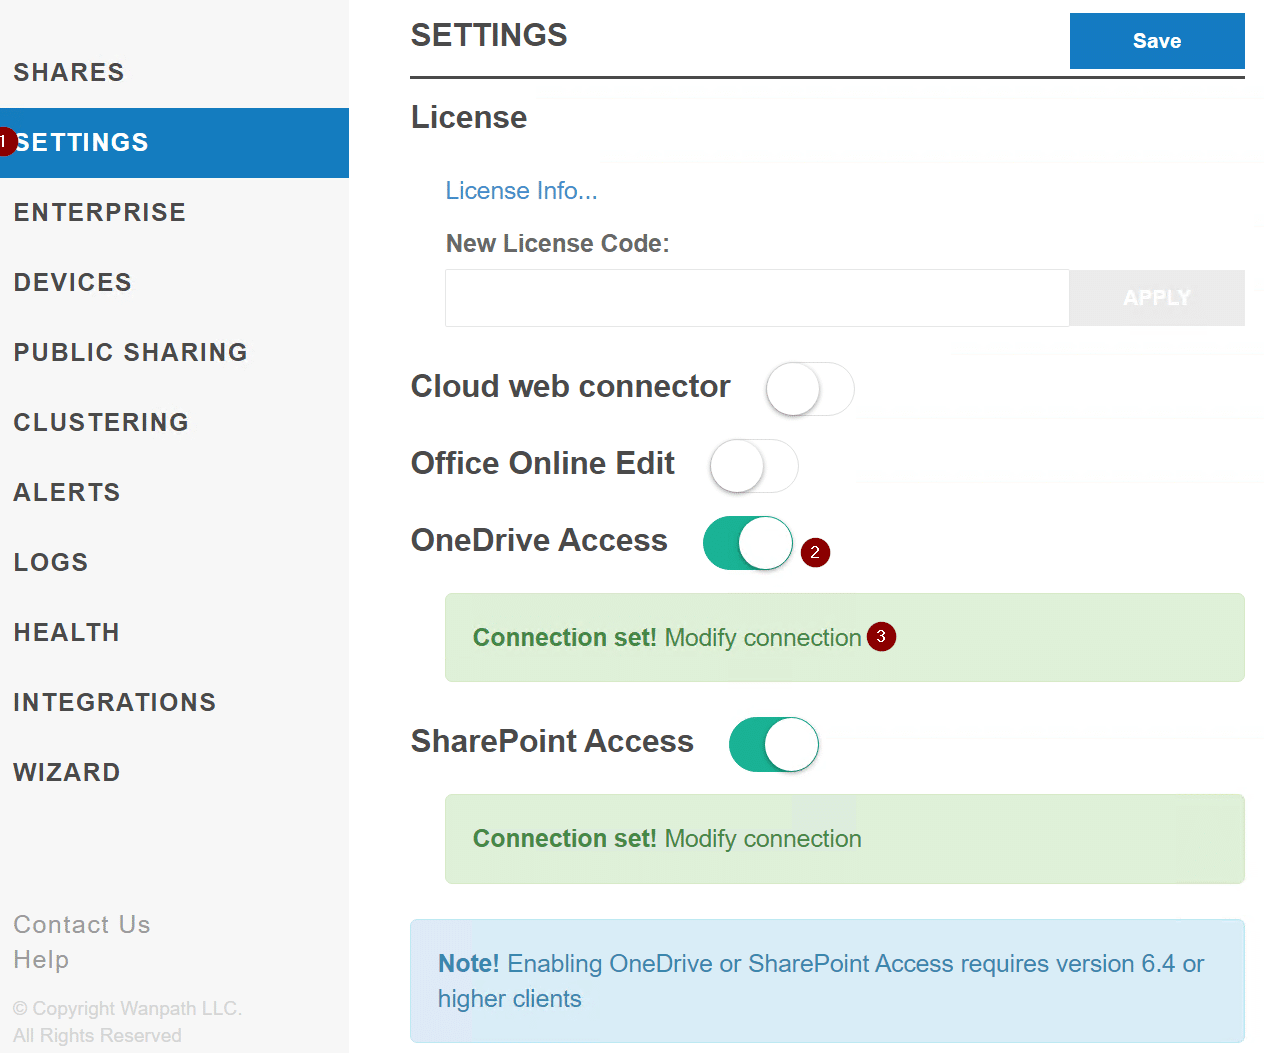
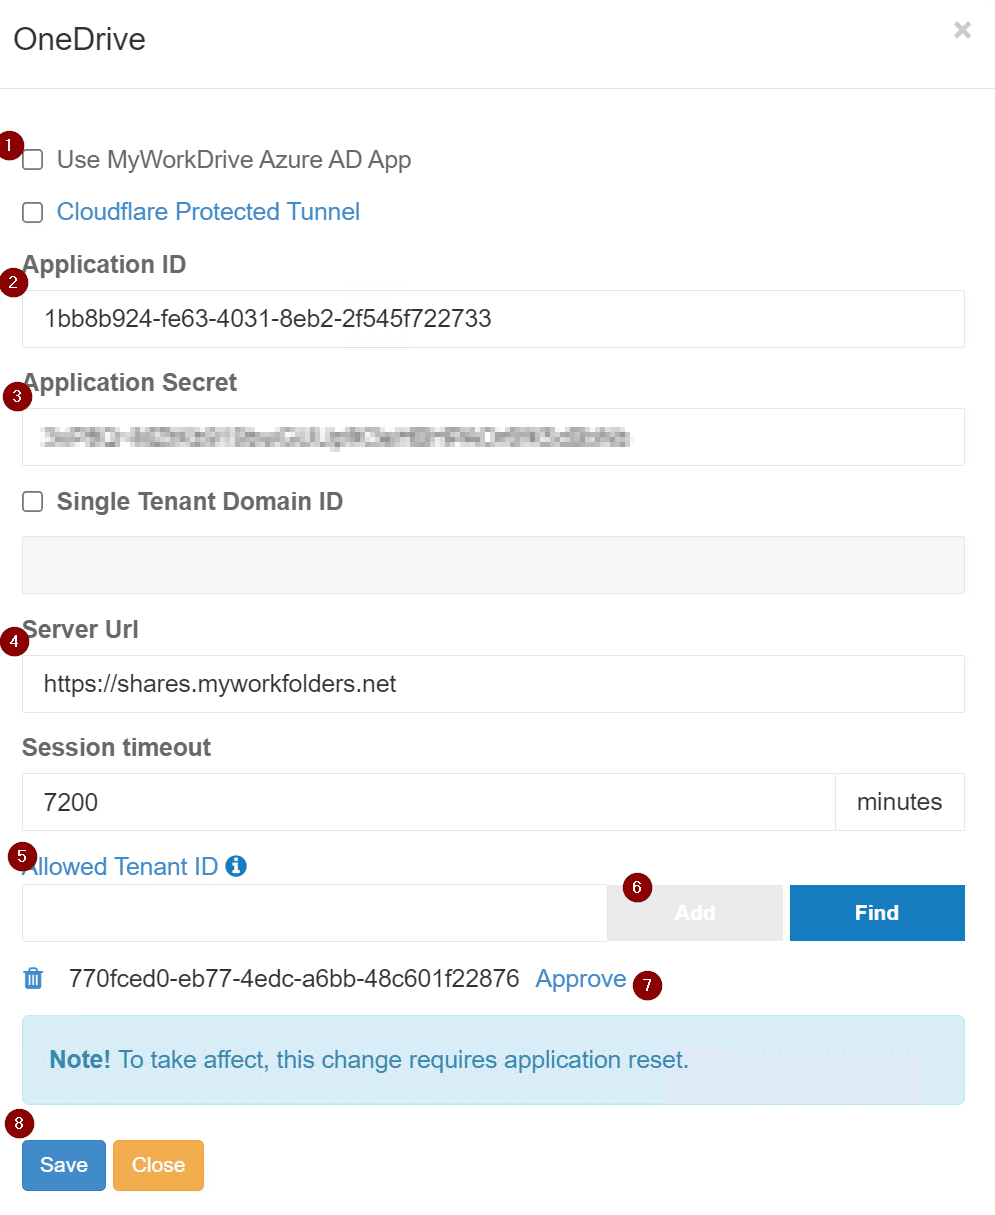
Now, log into the MyWorkDrive server, navigate to the Settings tab, enable OneDrive Access and/or SharePoint Access, then select Modify connection.
On the connection page, uncheck Use MyWorkDrive Azure AD App, enter in the application ID, Application Secret (Value), enter in tenant ID under Allowed Tenant ID and select find. After it finds your tenant, select Approve click Save. Repeat these same steps for the other service access if you want to leverage both.
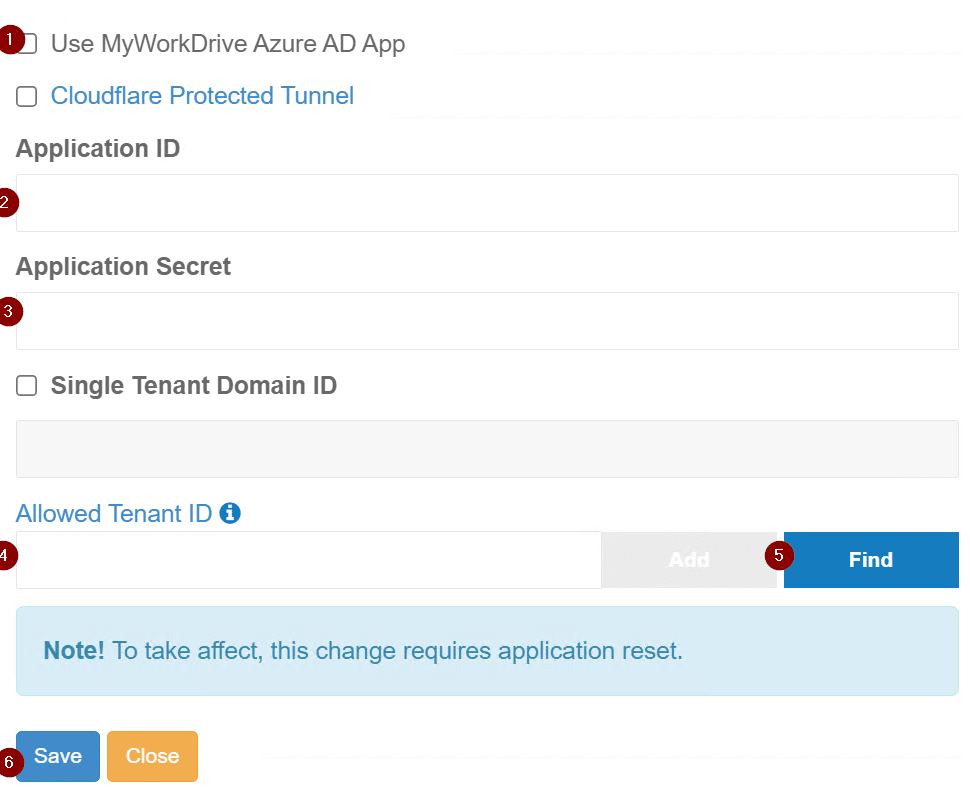

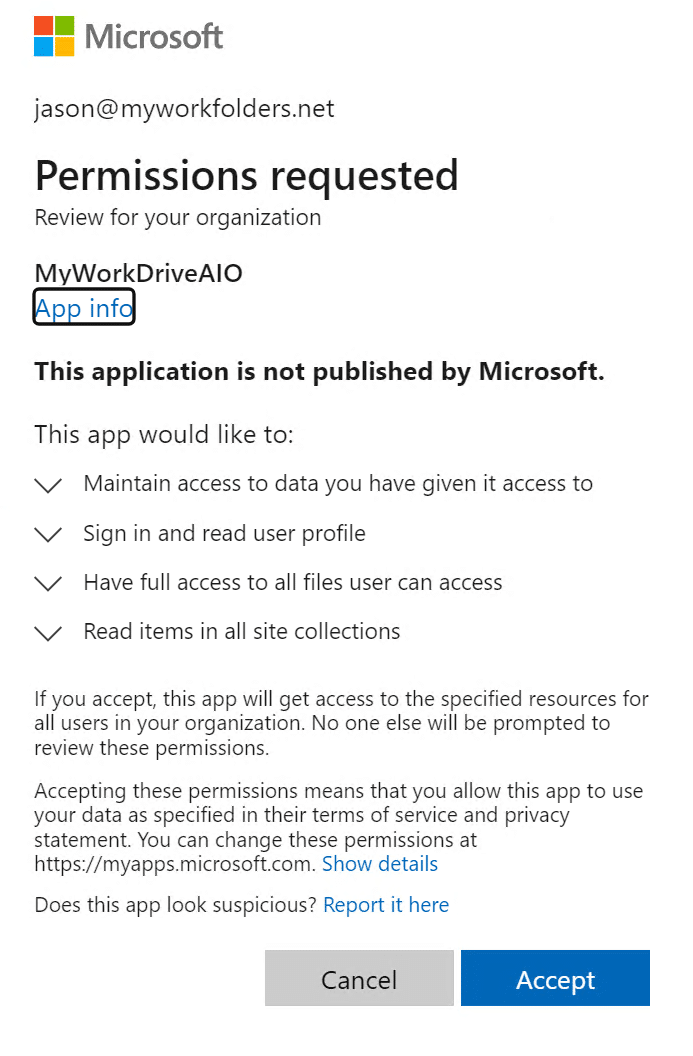
After hitting approve, you will be met with an Azure login to approve the application for your tenant. Sign in and approve the app.

OneDrive/SharePoint Office Online Edit
Next, we’ll configure this application to leverage OneDrive or SharePoint for editing office documents online.
Go back to the AzureAD Overview page and navigate to App registrations.

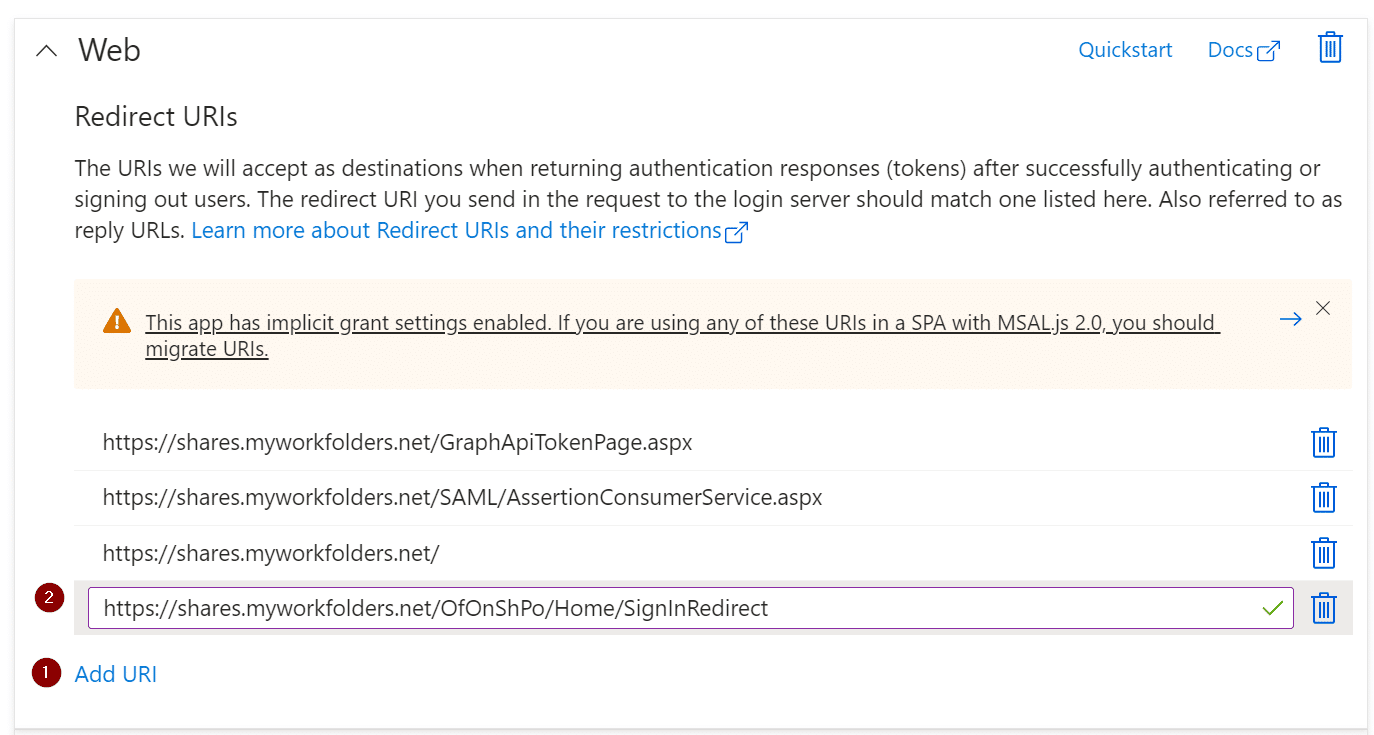
Next, browse to the Authentication window, under Web select Add URI, and then add another entry. The additional Redirect URI will be the same external address as your MyWorkDrive server with the addition of the suffix below and select Save.
OfOnShPo/Home/SignInRedirect
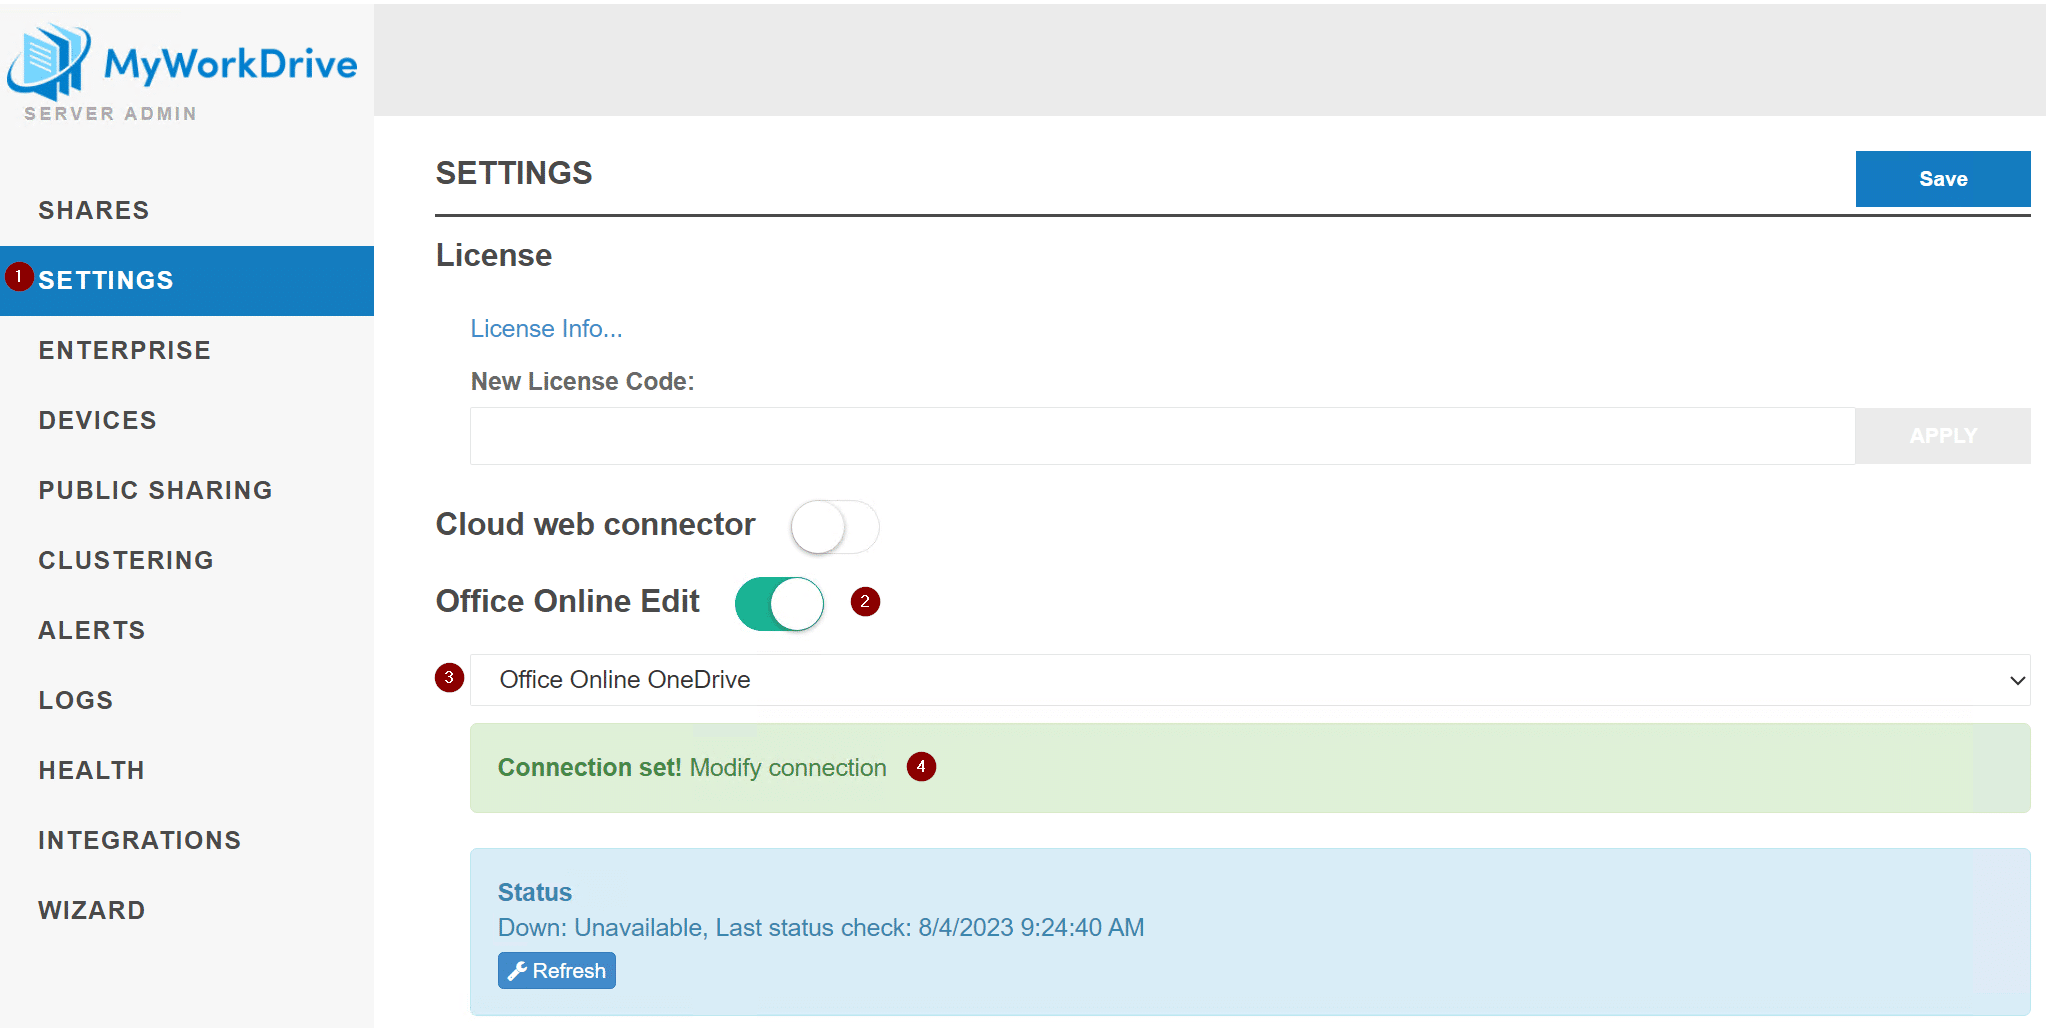
Now, log into the MyWorkDrive server, navigate to the Settings tab, enable Office Online Edit, select your preferred service, then select Modify connection.
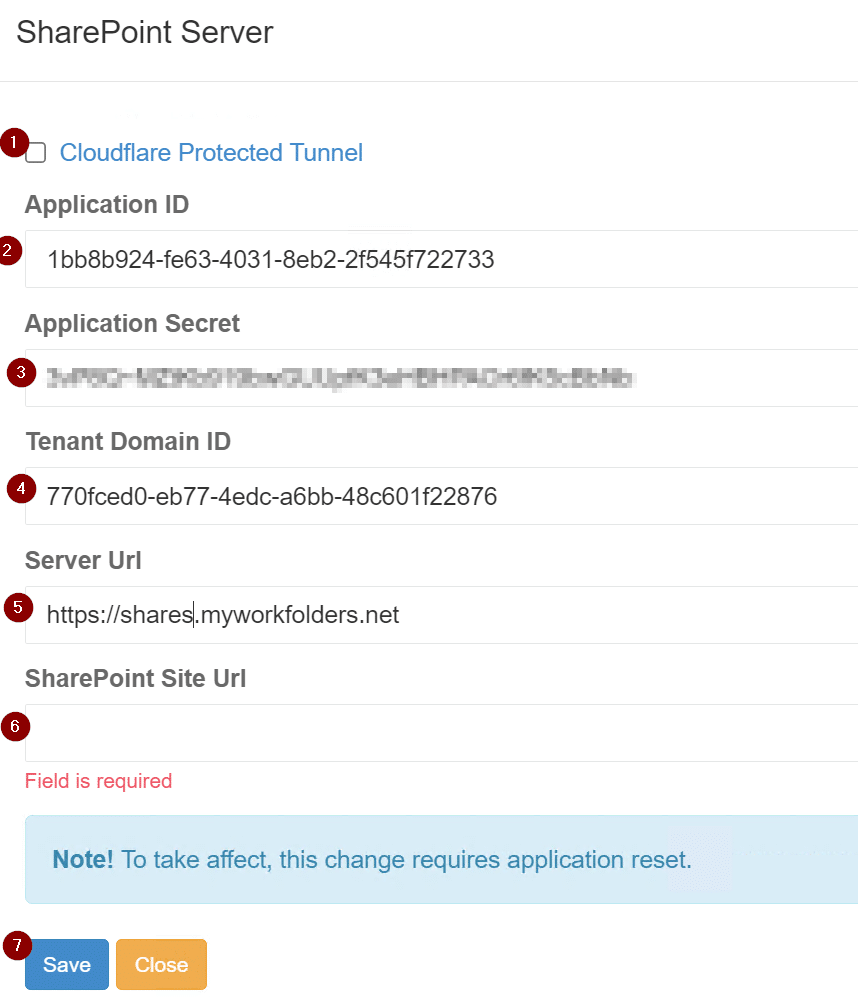
In the OneDrive connection page, uncheck Use MyWorkDrive Azure AD App, enter in the Application ID and Application Secret (Value) from earlier. Then enter in the external DNS name of the MyWorkDrive server. Paste in your Allowed Tenant ID, select Add and hit Approve. An Azure login page will come up requesting a login from an administrator to approve the usage of the app. After authenticating and approving, go back to the OneDrive connection page and hit Save.
The SharePoint process is the same process with the addition of needing to specify the SharePoint site to use for editing:
AzureAD Administrator Consent Approval
Another option to approve the application permission is to do it from AzureAD.
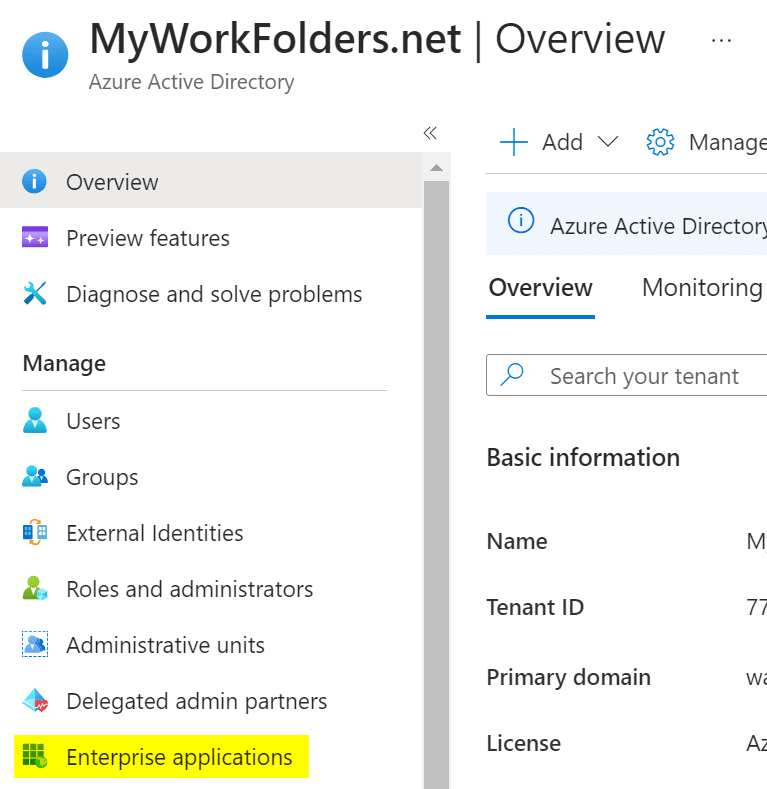
In order to approve the permissions, navigate to AzureAD and select Enterprise applications
On the Enterprise applications page, navigate to the Admin consent requests
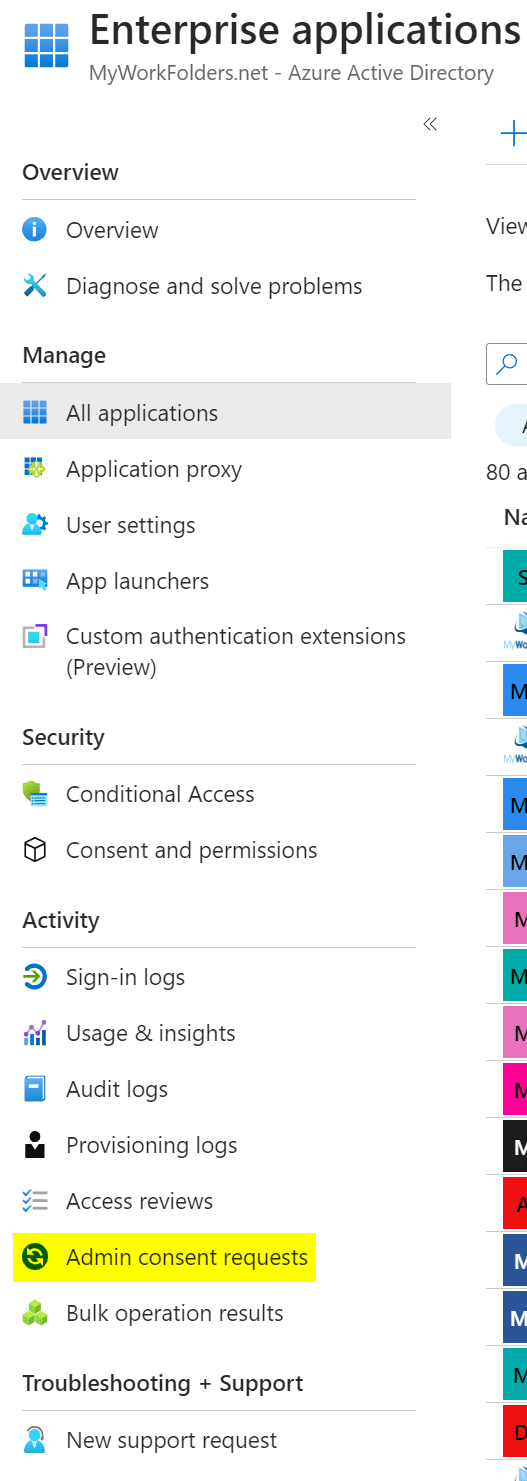
On the Admin consent request page there will be a list of applications requiring approval. In some environments, this process may work while the one mentioned in previous steps may now.