MyWorkDrive Server Version 6.1.1 or Higher Required
The SharePoint Office Online editing service mode option works by temporarily copying the file to be edited using the Azure Graph API running as an AAD Application Service with permissions to a dedicated SharePoint Online site. A file lock is placed on the file on-premises, monitored for edits and co-edits, and finally, removed once editing is completed from the SharePoint Site. Unlike our OneDrive option, the SharePoint editing option centralizes temporary files to a single site instead of placing them on each user’s OneDrive folder and does not require any user permissions on the SharePoint site.
With the SharePoint Office editing option, users will need to specify a SharePoint site to store temporary documents and secure it with permissions to only the SharePoint site owners and the dedicated Azure AD application. By locking it down to only SharePoint site owners and their own Azure AD app registration, administrators are ensuring the highest level of security.
The Application Service mode utilizes the new Azure Graph API Sites.Selected application permission role. Microsoft Graph now provides the option to grant granular permissions using the new Graph API Sites.Selected application permission for each AAD application Registration instead of granting permission for all the sites in the tenant. The Azure Graph API permission, Sites.Selected, does not provide access to any SharePoint site collections for the application unless the AAD application has been additionally assigned the permission roles: (read/write) by a SharePoint admin. No user permissions or delegation will be needed on the SharePoint Online site. The new Azure Graph API Site.Selected MyWorkDrive Azure AD Application service mode provides the following security benefits.
- No user access to the SharePoint Site or temporary files.
- Azure AD App Registration only granted rights to a dedicated site controlled by SharePoint owners (no access to other SharePoint sites, files, or logins).
- Users edit online using a temporarily organizationally locked-down sharing link with no permissions to the SharePoint Online site.
- SharePoint site owners may restore temporary files or empty the recycle bin automatically using Power Automate.
Step 1: SharePoint Site Setup
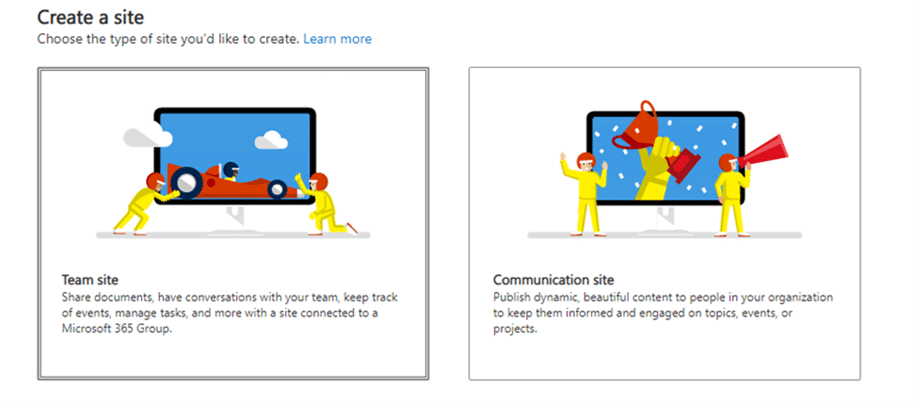
Go to Create a Site and select Team site in SharePoint Online – note the URL: e.g. https://contoso.sharepoint.com/sites/MyWorkDriveEdit
Provide a Site name.
Select, Private – only members can access this site, in Privacy settings.
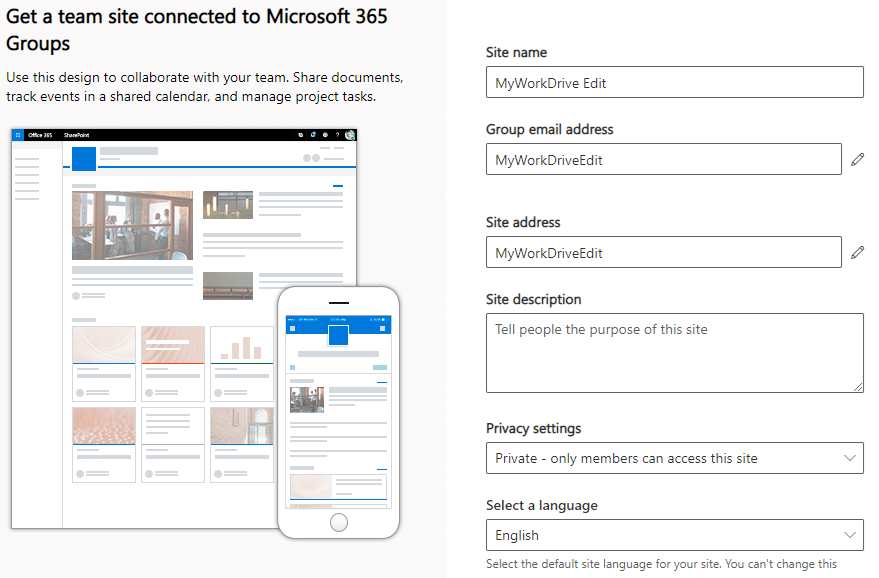
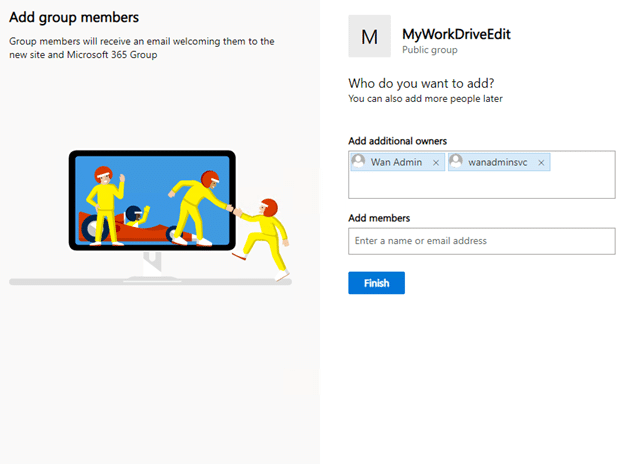
Specify any additional owners.
Remove Permissions, Components, and Views as needed.
In Quick Launch (Site Settings), you can:
- Remove: notebook, conversions, pages, and site contents
- Remove features at:
/sites/MyWorkDriveEdit/_layouts/15/ManageFeatures.aspx - Disable or edit following content
- Disable or edit SharePoint recommendations
- Disable or edit site pages
- Disable or edit workflow task content type
- Disable or edit site libraries and lists at:
/sites/MyWorkDriveEdit/_layouts/15/mcontent.aspx
Customize “Documents” library (Advanced Settings):
- Open documents in the browser
- Make new folder command line available: No
- Search: No
- Offline availability: No
Site Sharing Settings:
- Only site owners can share files, folders, and the site
- Allow access requests: Off
Note the Site URL: This will be needed later during setup of the Azure AD App Registration and on the MyWorkDrive Server.
For example:https://contoso.sharepoint.com/sites/MyWorkDriveEdit
Step 2: Custom Azure AD App Registration
Each organization will need its Azure AD Global Admin to create an Azure AD App registration with only Microsoft Graph API Access to Sites.Selected.
Security Note: Note this application registration itself does not provide any SharePoint site permissions – it’s only used in later steps to allow the SharePoint site owners to grant it permissions to a specific SharePoint site.
Create a new Azure AD App Registration in the same Azure AD as your user’s Office 365 Subscription. This will be used to allow SharePoint Administrators to provide Graph API application site permissions.
On portal.azure.com, log in using the Global Admin Account. Bring up Azure Active Directory:
https://portal.azure.com/#blade/Microsoft_AAD_IAM/ActiveDirectoryMenuBlade
Click App Registrations, then Create New Registration.
Provide a Name, Supported Account Type, and include your public MyWorkDrive URL with the subsite "/OfOnShPo/Home/SignInRedirect".
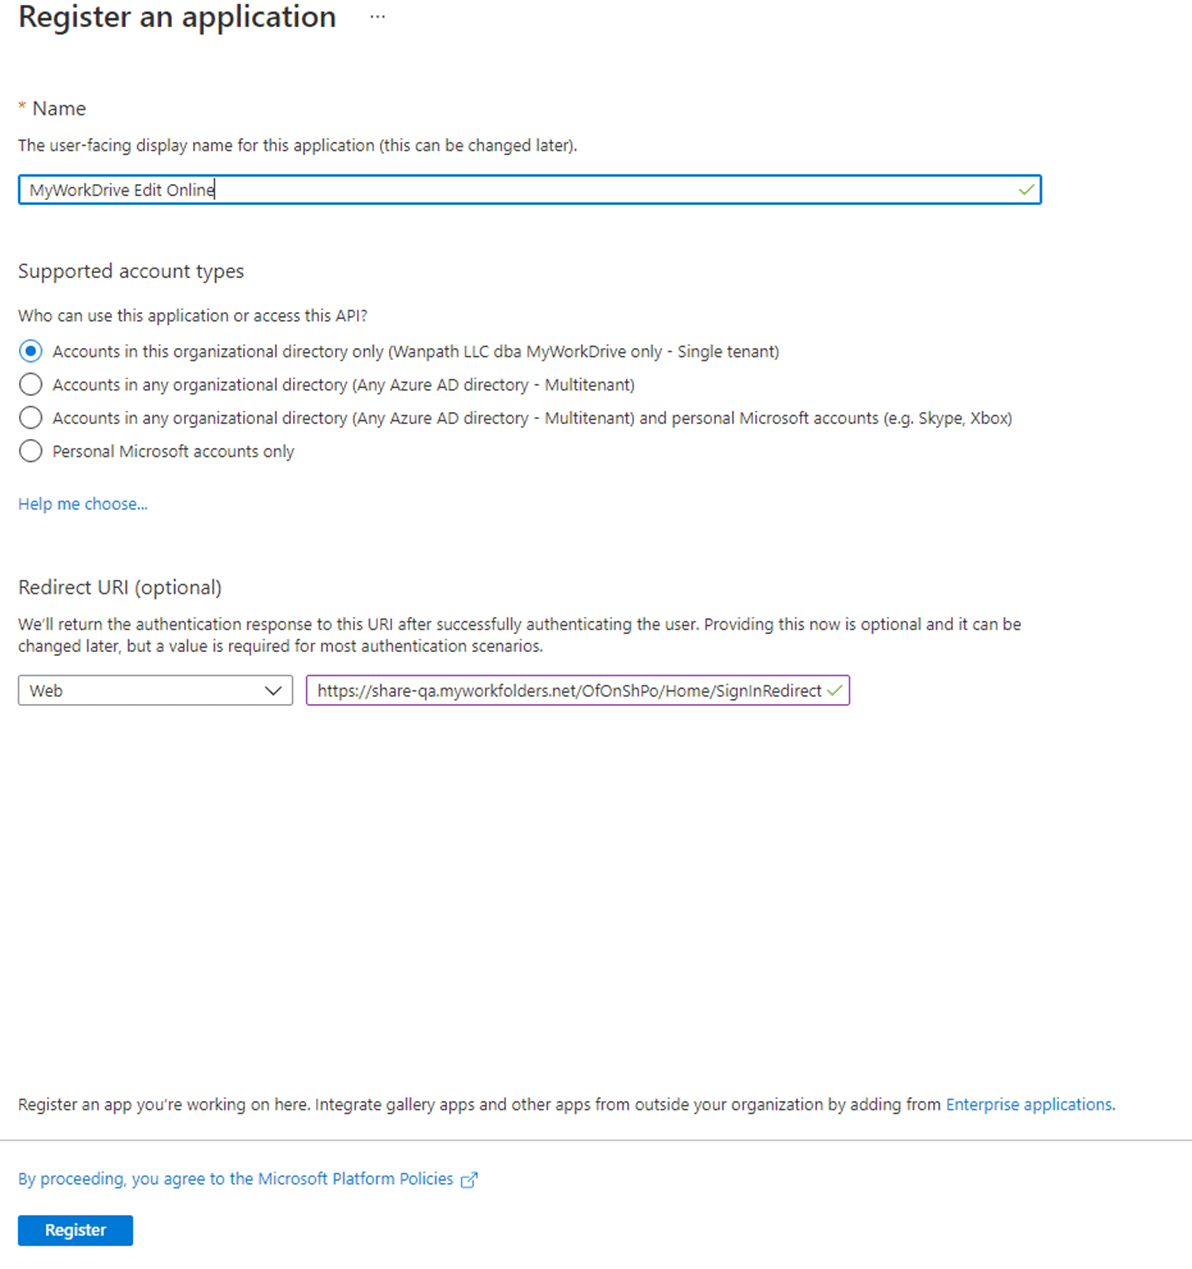
Click Register.
Optional
Instead of using your own Public Server Redirect URL, you may use our Cloudflare-assigned hostname under our MyWorkDrive.net domain. In this case, Cloudflare must be permitted from the MyWorkDrive Server to Cloudflare. When Cloudflare is used, you will need to enter https://*.online.myworkdrive.net as an allowed host to your Customer Azure AD Application instead of using your own hostname values.
Azure AD App Registrations do not allow entering a wildcard directly. To enter a wildcard, insert a temporary address such as https://temp.online.myworkdrive.net/OfOnShPo/Home/SignInRedirect
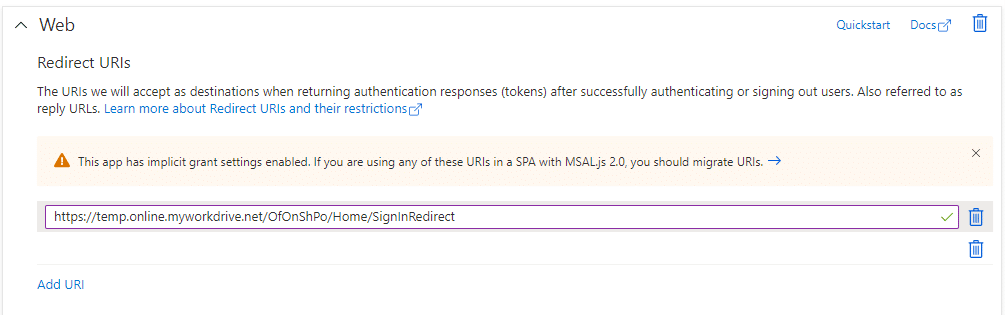
To update the URL, click Manifest to edit it, and update the temporary URL to https://*.online.myworkdrive.net/OfOnShPo/Home/SignInRedirect.

API Permissions
Click API permissions, Add Graph API Application Permissions: Microsoft Graph – Sites.Selected

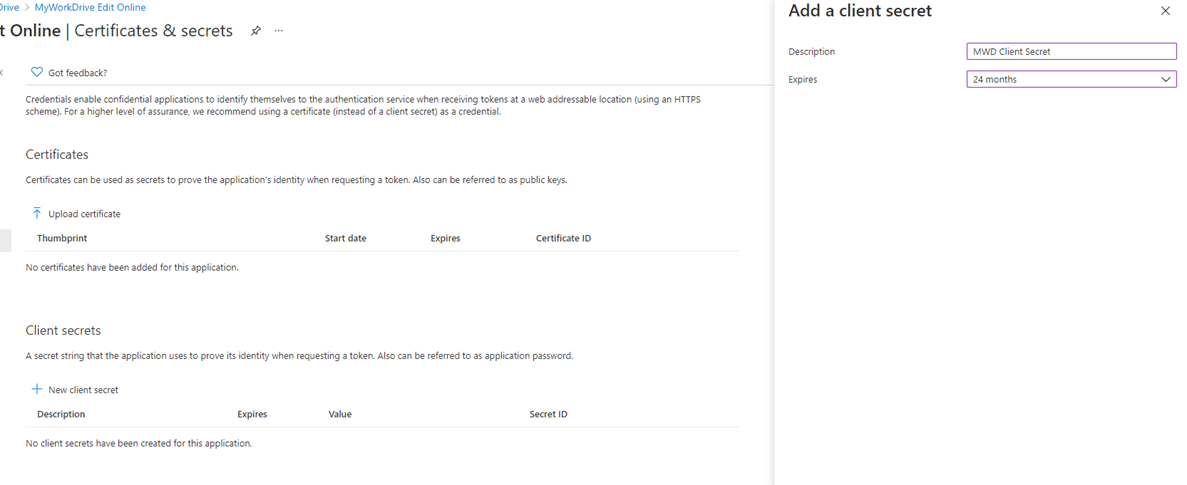
Go to: Create Client Secret > Certificates & Secrets > New client secret
Take note of the Calendar Secret Expiration Date, as it will need to be regenerated at that time and updated on all MyWorkDrive Servers.
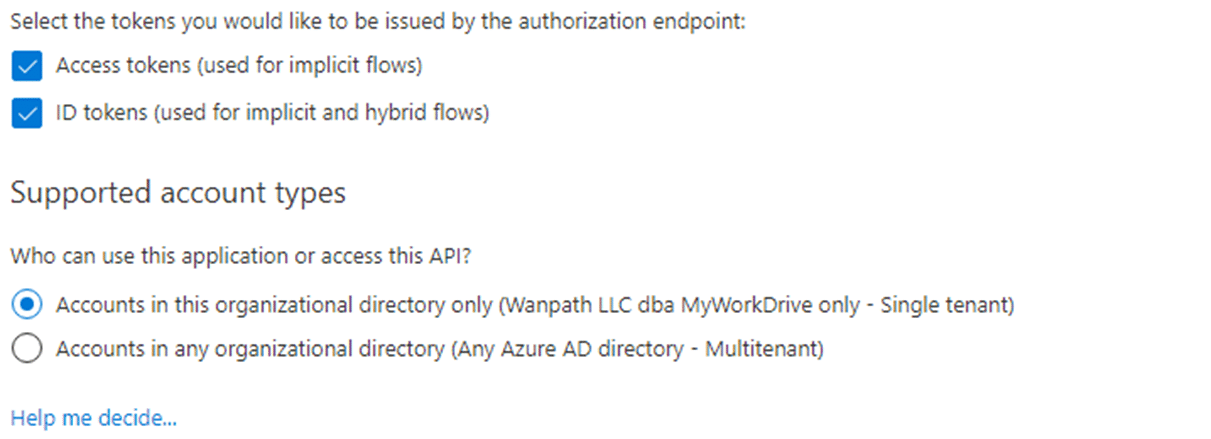
Click Authentication and enable Access Tokens and ID tokens.
Copy the Client Secret Value (not the secret ID). Keep this backed up and secured, as it will only display briefly.
Click Overview: Copy the Application (client) ID. Retain this value for use in the MyWorkDrive admin panel.
Copy the Directory (tenant) ID. Retain this value for use in the MyWorkDrive admin panel.
Note the Client Secret Expiration – this will need to be renewed before it expires and updated on each MyWorkDrive Server in the future.
Update branding on your custom Azure AD App Registration to verify the app or add a company logo as desired.
Step 3: Grant SharePoint Site Application Permissions
The SharePoint Online site owner will need to grant write permissions to the Azure AD Application. There are multiple methods to grant SharePoint Site permissions to the Azure AD Application. The easiest is to use PnP PowerShell to grant the permission. To grant the permission, the SharePoint owner will need the Azure Application Registration App ID and site URL.
Requirements
- The user must be a SharePoint Site Owner
- PowerShell Version 7 or higher
In addition to using PnP PowerShell, we have made a SharePoint Web Part available, which adds an app to a SharePoint site that can be used to grant permissions.
To run PnP PowerShell cmdlets, first install PnP PowerShell and then run the following commands (replace placeholders with your own SharePoint site URL and tenant details):
-
Install PnP PowerShell module
Install-Module PnP.PowerShell -
Register an Azure App for interactive login
Register-PnPEntraIDAppForInteractiveLogin -ApplicationName "MWDPnP" -Tenant "yourtenant.onmicrosoft.com" -
Connect to the SharePoint Online Admin Center of your tenant and log in using an account with Owner Permissions on the SharePoint site
Connect-PnPOnline -Url "https://contoso.sharepoint.com/site/yoursitename" -Interactive -ClientId "YourClientID"Note in this step you are using the PNP App "ClientID" -
Grant the Azure AD Application Write Permissions to the site
Grant-PnPAzureADAppSitePermission -AppId "YourAppID" -DisplayName "mwd-service" -Site "https://contoso.sharepoint.com/site/yoursitename" -Permissions "Write"Note in this step you are using the AppId (App Registration ID) not the ClientId from step 3
Special Considerations for GCC, GCC High, DoD
If you are deploying SharePoint Service mode editing in a cloud other than commercial/retail, the Powershell comands and process will differ slightly.
In step 2, when Registering for Interactive Login, you must specify an AzureEnviornment as part of the Powershell command,
Replace
Register-PnPEntraIDAppForInteractiveLogin -ApplicationName "MWDPnP"-Tenant “yourtenant.onmicrosoft.com"
with
Register-PnPEntraIDAppForInteractiveLogin -ApplicationName "MWDPnP" -Tenant "yourtenant.onmicrosoft.com" -AzureEnvironment USGovernmentHigh
The optional AzureEnvironment parameters are
| Environment | Parameter Value | Use Case |
|---|---|---|
| Commercial/Retail | (omit/none) | Worldwide M365 |
| GCC | USGovernment | Moderate Gov |
| GCC High | USGovernmentHigh | High Gov |
| DoD | USGovernmentDoD | Department of Defense |
To obtain the ClientID for step 3, you may have to browse to the new application in Azure to obtain the ClientID from the app in Azure, as it may not be returned inline in Powershell as it will in Retail/Commercial cloud.
Finally, Step 3, The Connect-PNnOnline command also needs to be adjusted. You must specify the AzureEnviornment and your Tenant. Typically your SharePoint site URL will also use .US instead of .COM.
Replace
Connect-PnPOnline -Url "https://contoso.sharepoint.com/site/yoursitename" -Interactive -ClientId "YourClientID"
with
Connect-PnPOnline -Url "https://contoso.sharepoint.us/sites/yoursitename" -Interactive -ClientId "YourClientID" -AzureEnvironment USGovernmentHigh -Tenant "yourtenant.onmicrosoft.com"
The available options for AzureEnviornment are the same as above.
There is no change to Grant-PnpAzureADAppSitePermission for alternate clouds, just be sure to use a .US SharePoint URL.
Step 4: MyWorkDrive Server Configuration
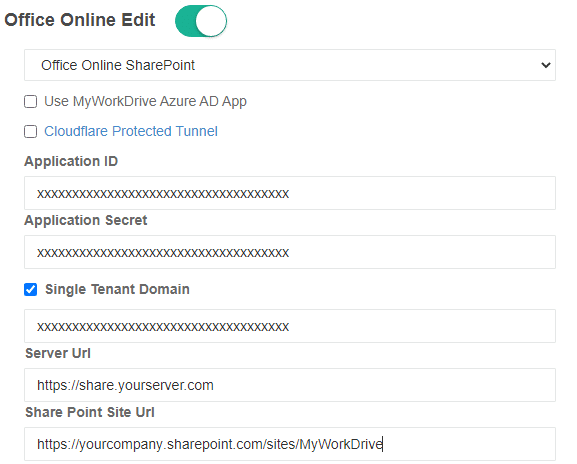
Paste the values of the Azure AD Application ID, Secret, Single Tenant Domain ID, Your Server URL, and finally your SharePoint site URL.
Office Online editing using the SharePoint site should now be ready for testing using your Custom Azure AD App Registration.
File Locking & Monitoring Process
When files are opened using the SharePoint editing option, they are locked on the MyWorkDrive server and set to allow co-editing. If other users wish, they may co-edit the file in Office Online through the browser. Traditional mapped drive or local Office users will receive a file locked message while the user has the file open for edit in Office Online, SharePoint editing.
The MyWorkDrive server will monitor files for changes every one minute. If changes are found, they will be copied to the Windows file share. If no changes are found, MyWorkDrive will attempt to determine if the user has completed editing. If the user closes the browser tab, the file will be removed from SharePoint immediately after copying changes back to the Windows file share through MyWorkDrive. If communication is lost, MyWorkDrive will attempt to remove the file until it is unlocked on SharePoint.
MyWorkDrive will attempt to close the user’s browser tab if no changes are made to the document that exceed the overall idle timeout setting.
Session Timeout Settings
To prevent users from keeping idle files open for co-edit, customers may wish to set idle timeout settings https://docs.microsoft.com/en-us/sharepoint/sign-out-inactive-users.
- The policy is applicable to the entire tenant and cannot be scoped to user/users or SharePoint sites.
- Users on managed devices, or those who select Keep Me Signed In during sign-in, will not be signed out.
Conditional access policies may also be used.
File Size Limits
Note that Microsoft enforces file size limits for editing with Office Online. Those limits vary by file type. Specific information about current file size limits is available in these two articles
Microsoft 365 file size limits and File size limits for workbooks in SharePoint